2. 7. 1. Enhanced Printing Options > Printing banners or at other non-standard sizes >
Printing Vertical or Horizontal Banners (Large-Format Printing)
Printing Vertical or Horizontal Banners (Large-Format Printing)
However, you may not be able to print 18.0 m due to restrictions in the settable document size according to the application software.
For instructions on printing vertical or horizontal banners, refer to the following topics, as appropriate for your computer and operating system.
•Printing Vertical or Horizontal Banners (Large-Format Printing; Windows) (2.7.2)
•Printing Vertical or Horizontal Banners (Large-Format Printing; Mac OS X) (2.7.3)
| Important | ||
|
• Before printing, check how much of the roll paper is left. If you have activated automatic detection of the remaining roll paper, a warning message is displayed when there is not enough roll paper left.
• If not much ink is left, prepare replacement ink tanks.
• To print at a higher level of quality, in the printer driver, choose High or Highest in Print Quality, and choose Unidirectional Printing as the direction of printing.
|
||
2. 7. 2. Enhanced Printing Options > Printing banners or at other non-standard sizes >
Printing Vertical or Horizontal Banners (Large-Format Printing; Windows)
Printing Vertical or Horizontal Banners (Large-Format Printing; Windows)
By automatic enlargement of a document created with an application software by the printer driver, you can print maximum 18.0 m vertical or horizontal banners.
However, you may not be able to print 18.0 m due to restrictions in the settable document size according to the application software.
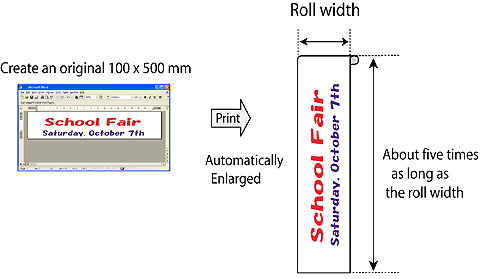
This topic describes how to print a banner about five times as long as the roll width based on the following example.
•Document: A horizontal banner created in Microsoft Word
•Page size: Non-standard (100×500 mm [3.9×19.7 in])
•Paper: Roll
•Paper type: Plain Paper
•Roll paper width: 16 in (406.4 mm)
The print procedure is as follows.
1.Register a Custom Paper Size in the printer driver.
Call a non-standard paper size registered in the printer driver with Custom Paper Size.
Once you register Custom Paper Size, you then can select it repeatedly from the paper size list.
Custom Paper Size can be set up to 18.0 m.
2.In the application, create an original in the size you registered.
3.Print the banner, using the settings that correspond to banners.
| Registering a Custom Paper Size | ||||||
|
This example describes how to register a paper size that is horizontally elongated and suitable for banners in either horizontal or vertical format.
|

| Creating the banner in the application | |||||
|
Follow the steps below to create the banner in Microsoft Word using the Custom Paper Size you registered.
|
| Printing the banner | |||||||||||||||
|
Follow these steps to print the banner using the corresponding banner settings.
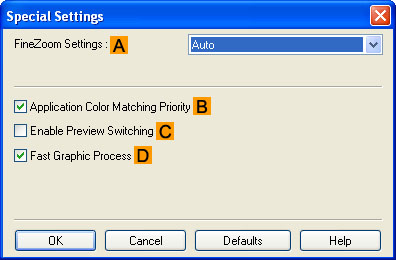
If printing is unsuccessful, you may be able to print after completing the following setting.
|
2. 7. 3. Enhanced Printing Options > Printing banners or at other non-standard sizes >
Printing Vertical or Horizontal Banners (Large-Format Printing; Mac OS X)
Printing Vertical or Horizontal Banners (Large-Format Printing; Mac OS X)
By automatic enlargement of a document created with an application software by the printer driver, you can print maximum 18.0 m vertical or horizontal banners.
This topic describes how to print a banner about five times as long as the roll width based on the following example.
•Document: An original designed for a horizontal banner
•Page Size: Non-standard (100×500 mm [3.9×19.7 in])
•Paper: Roll
•Paper type: Plain Paper
•Roll paper width: 16 inches (406.4 mm)
The print procedure is as follows.
1.In the application, create an original in the format of a horizontal or vertical banner.
2.In Page Setup, register Custom Page Sizes (Mac OS X 10.3.9–10.5) / Custom Paper Sizes (Mac OS X 10.6).
Once you register Custom Page Sizes / Custom Paper Sizes, you then can select it repeatedly from the paper size list.
Custom Page Sizes / Custom Paper Sizes can be set up to 18.0 m.
3.Print the banner, using the settings that correspond to banners.
| Note | ||
|
• The following procedures are based on Mac OS X 10.5. The method of setting up non-standard paper sizes varies depending on the version of Mac OS X.
|
||
| Register a Custom Page Sizes | ||
|
This example describes how to register and print using a page size that is horizontally elongated and suitable for banners in either horizontal or vertical format.
|
| Print the banner | |||||||||||||
|
Follow the steps below to print the banner using the corresponding banner settings.
|
2. 7. 4. Enhanced Printing Options > Printing banners or at other non-standard sizes >
Printing on Non-Standard Paper Sizes
Printing on Non-Standard Paper Sizes
Once you register a paper size, you then can select it repeatedly from the paper size list. The paper size can be set up to 18.0 m.
| Note | ||
|
• In Windows, although you can even set Custom Size for the paper size, the maximum settable size is 3.2 m. The setting of Custom Size is disabled when you exit the application software.
|
||
For instructions on specifying non-standard paper sizes for printing, refer to the following topics, as appropriate for your computer and operating system.
2. 7. 5. Enhanced Printing Options > Printing banners or at other non-standard sizes >
Printing on Non-Standard Paper Sizes (Windows)
Printing on Non-Standard Paper Sizes (Windows)
Call a non-standard paper size registered in the printer driver with Custom Paper Size.
Once you register Custom Paper Size, you then can select it repeatedly from the paper size list.
Custom Paper Size can be set up to 18.0 m.
| Note | ||
|
• Although you also can set Custom Size for the paper size temporarily, the maximum settable size is 3.2 m. Also, the setting of Custom Size is disabled when you exit the application software.
|
||
| Registering and Printing With a Custom Paper Size | ||||||||||||
|
This topic describes how to register a non-standard paper size by the name of 430 mm Squareand print based on the following example.
•Document: Any Type
•Page Size: A square sheet (430 × 430 mm [16.9 × 16.9 in])
•Paper: Sheets
•Media Type: Any type
•Paper Size: A square sheet (430 × 430 mm [16.9 × 16.9 in])
|
| Printing by using Custom Size | |||||||
|
This section describes how to print using Custom Size based on the following example.
•Document: Any Type
•Page size: Square of non-standard dimensions (430×430 mm [16.9×16.9 in])
•Paper: Sheets
•Paper type: Any type
•Paper Size: A square sheet (430 × 430 mm [16.9 × 16.9 in])
|
2. 7. 6. Enhanced Printing Options > Printing banners or at other non-standard sizes >
Printing on Non-Standard Paper Sizes (Mac OS X)
Printing on Non-Standard Paper Sizes (Mac OS X)
Call a non-standard paper size registered in the printer driver with Custom Page Sizes (Mac OS X 10.3.9-10.5)/ Custom Paper Sizes (Mac OS X 10.6).
Once you register Custom Page Sizes / Custom Paper Sizes, you then can select it repeatedly from the paper size list.
Custom Page Sizes / Custom Paper Sizes can be set up to 18.0 m.
This topic describes how to register a non-standard paper size by the name of 430*430and print based on the following example.
•Document: Any Type
•Page Size: A square sheet (430 × 430 mm [16.9 × 16.9 in])
•Paper: Sheets
•Media Type: Any type
•Paper Size: A square sheet (430 × 430 mm [16.9 × 16.9 in])
| Note | ||
|
• The following procedures are based on Mac OS X 10.5. The method of setting up non-standard paper sizes varies depending on the version of Mac OS X.
|
||
- Create the document in the application.
- Load the square paper (430 × 430 mm [16.9 × 16.9 in]) in the printer.
- Choose Print in the application menu.

- Select the printer in the APrinter list.
- Click Manage Custom Sizes in the FPaper Size list to display the Custom Page Sizes dialog box.
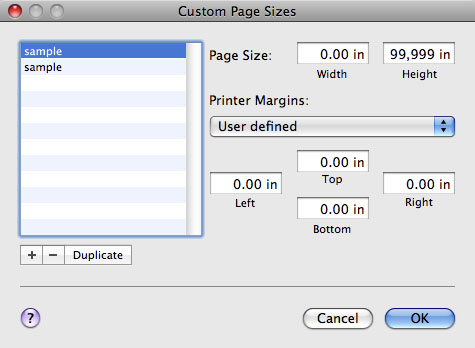
- In Page Size, enter the height and width of the original. Here, enter 43.00 cm in Height and Width.
- In Printer Margins, enter 0.5 for the top and side margins and 2.3 for the bottom margin. Here, measurements are entered in centimeters.
- Double-click Untitled in the list at left in the Custom Page Sizes dialog box and enter the paper name—in this case, 430*430.
- Click OK to close the Custom Page Sizes dialog box.
- In the FPaper Size list, click the size of the original. In this case, click 430*430, the size you registered.
- If you configured the settings using the Page Attributes dialog box, click OK to close the dialog box, and then select Print from the application software menu.
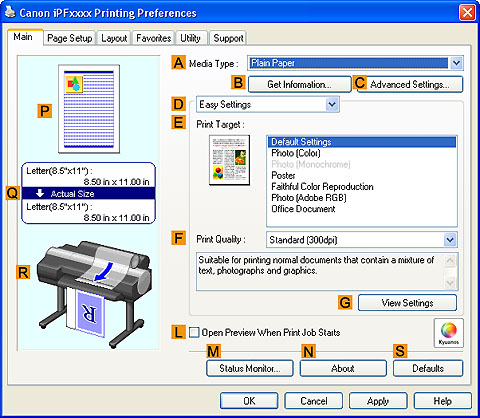
- Access the Main pane.
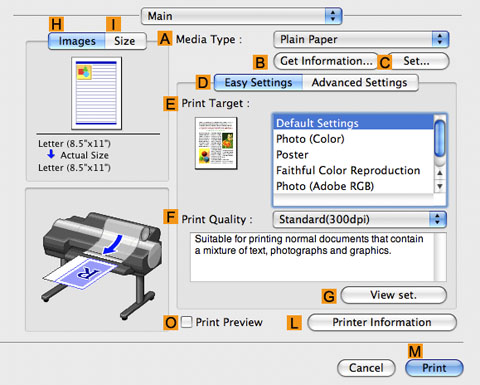
- In the AMedia Type list, select the type of paper that is loaded.
- After confirming that DEasy Settings is selected, select from the EPrint Target list.
- Make your selection in the FPrint Quality list.
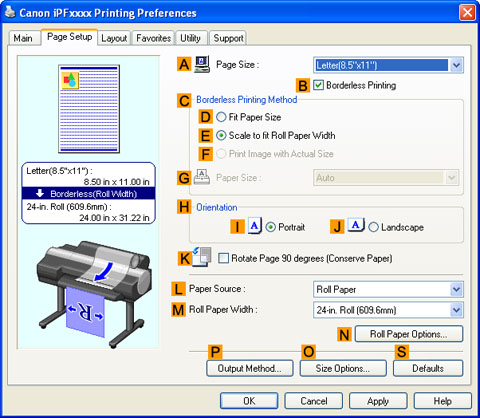
- Access the Page Setup pane.
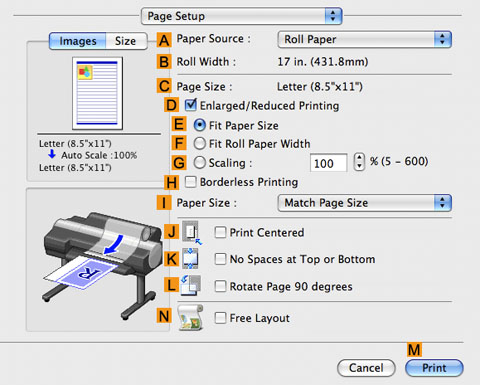
- Click Cut Sheet in the APaper Source list.
- In CPage Size, make sure 430*430 is displayed, as registered in Page Setup.
- Confirm the print settings, and then click MPrint to start printing.

Note • For tips on confirming print settings, see "Confirming Print Settings (4.1.3)"