3. 6. 1. Windows Software > Print Plug-In for Office >
Print Plug-In for Office features
Print Plug-In for Office features
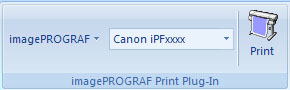
•It is displayed on the toolbar/ribbon, so it is easily accessible.
•It can be set by just selecting from the Wizard.
•Large-Format Printing custom size can also be set in the Wizard from Microsoft Word or Microsoft PowerPoint.
•Custom size can be set automatically from Microsoft Excel.
•The layout can be checked before printing by starting the preview screen.
| Important | ||
|
• The Print Plug-In for Office toolbar/ribbon might not be displayed in Microsoft Office after installing imagePROGRAF Print Plug-In for Office.
Refer to the following topic for details on how to display the imagePROGRAF Print Plug-In for Office toolbar/ribbon.
• When Print Plug-In for Office is not displayed (3.6.5)
|
||
3. 6. 2. Windows Software > Print Plug-In for Office >
Operating Environment
Operating Environment
•Compatible Operating System
Windows XP, Windows Server 2003, Windows Vista, Windows Server 2008, Windows 7
•Software that requires installation
Microsoft Office XP/2003/2007/2010
imagePROGRAF Printer Driver Ver. 3.95 or later
•Hardware
CPU 2.0 GHz Pentium 4 or better
RAM 512 MB or more
| Important | ||
|
• If you opened the Office document from Internet Explorer, the software will not run correctly.
• If you are editing an embedded object or link object, the software will not run correctly.
• If you added the imagePROGRAF Print Plug-In ribbon to the Microsoft Office 2007/2010 Quick Access toolbar, the software will not run correctly.
|
||
3. 6. 3. Windows Software > Print Plug-In for Office >
Steps to install
Steps to install
| Note | ||
|
• You must log into Windows as an Administrator before the installation.
|
||
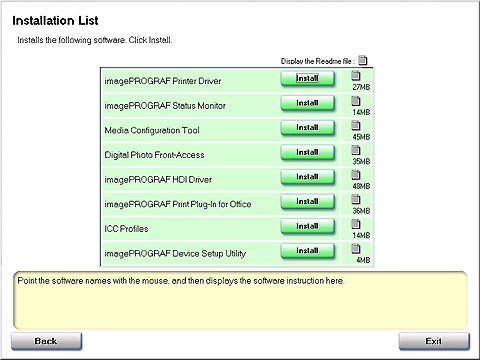
- Insert "User Software CD-ROM" into the CD-ROM drive and start the installer.

Note • If the installer screen does not display, open the CD-ROM icon from My Computer, click setup.exe, and open the icon. - Click the Install Individual Software button.

- Click Install in imagePROGRAF Print Plug-In for Office.
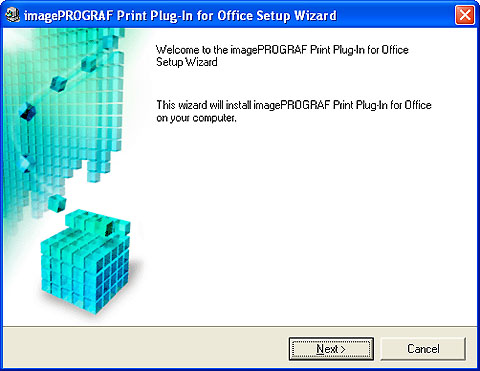
- Click the Next button.
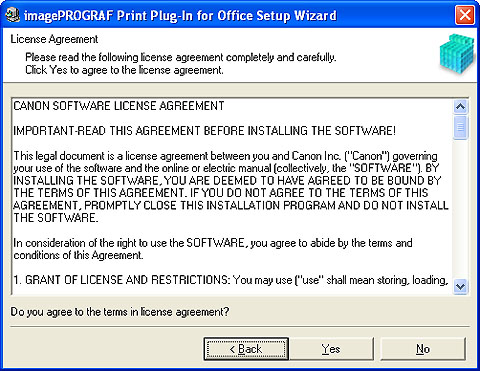
- Read the License Agreement, and click the Yes button.
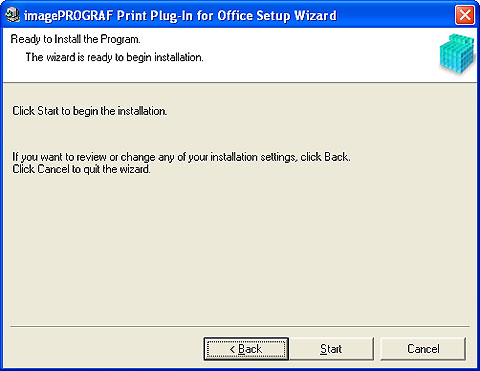
- Click the Start button.
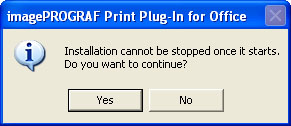
- Click the Yes button.
- Click the Exit button.
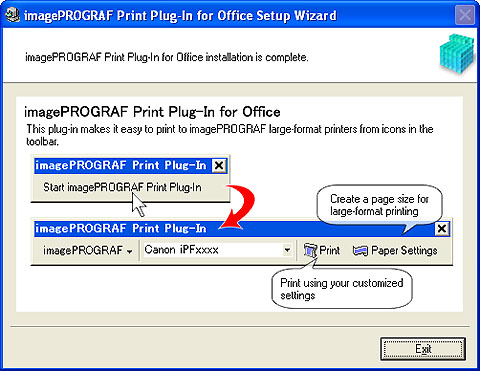 The installation for Print Plug-In for Office is complete.
| Important | ||
|
• When you install this software, the virtual printer Canon imagePROGRAF PrintPlugIn may be installed. If you want to use this software, do not uninstall the virtual printer Canon imagePROGRAF PrintPlugIn.
• The Print Plug-In for Office toolbar/ribbon might not be displayed in Microsoft Office after installing imagePROGRAF Print Plug-In for Office.
Refer to the following topic for details on how to display the imagePROGRAF Print Plug-In for Office toolbar/ribbon.
• When Print Plug-In for Office is not displayed (3.6.5)
|
||
3. 6. 4. Windows Software > Print Plug-In for Office >
Steps to uninstall
Steps to uninstall
- If Microsoft Office is open, close it.
- Select Control Panel from the start menu.
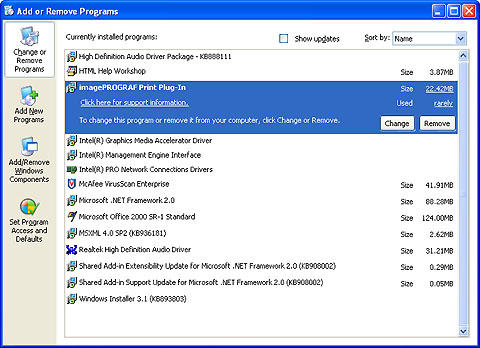
- Open Add or Remove Programs.
- Select imagePROGRAF Print Plug-In, and click the Remove button.
 |
| Note | ||
|
• You cannot uninstall Print Plug-In for Office if an Office application is running. When a message appears, select Cancel and close all Office applications that are running.
|
||
3. 6. 5. Windows Software > Print Plug-In for Office >
When Print Plug-In for Office is not displayed
When Print Plug-In for Office is not displayed
Buttons such as Start imagePROGRAF Print Plug-In sometimes do not appear in the Word, PowerPoint and Excel Office applications, and the Print Plug-In for Office functions are not available.
In this event, re-install Print Plug-In for Office.
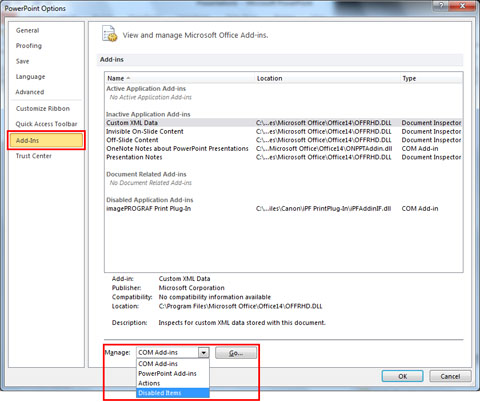
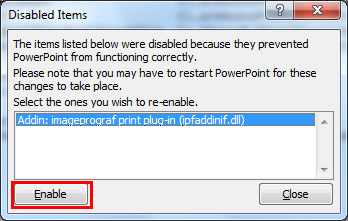
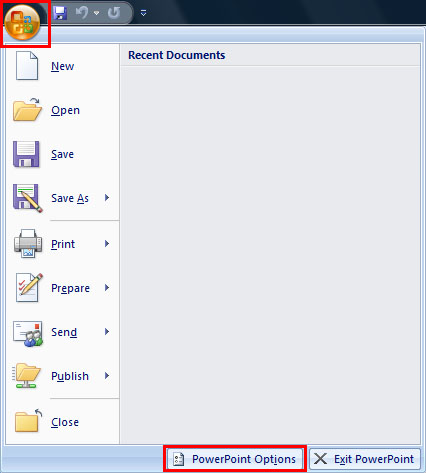
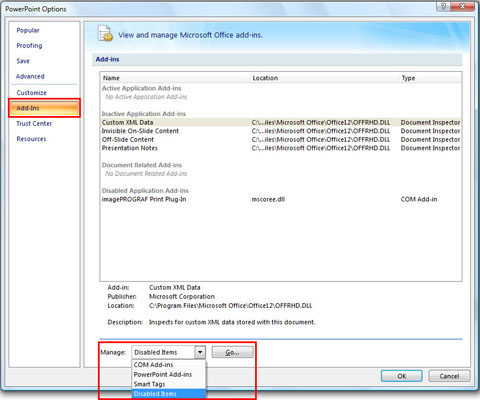
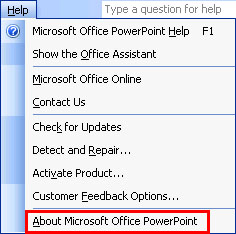
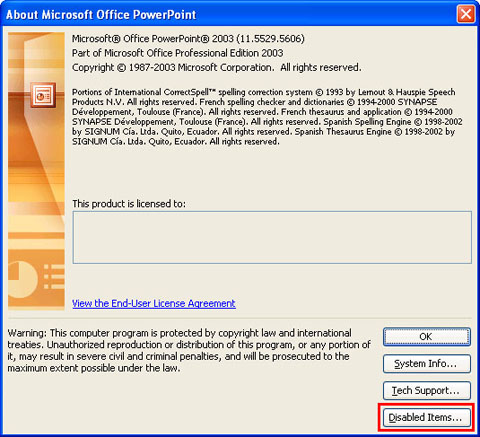
If you are using Microsoft Office 2003 or later, you can also enable add-ins to display Print Plug-In for Office.
See below for the procedure for re-installing the plug-in or enabling add-ins.
| Re-installing Print Plug-In for Office | |||||
|
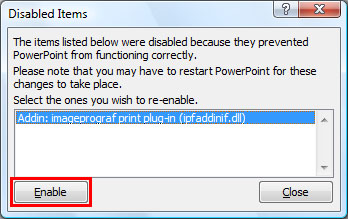
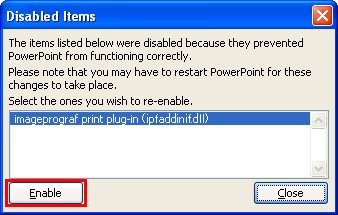
•If a problem occurs, such as the system or an application terminating abnormally, the Microsoft Office application disables add-ins as a safety precaution.
In this event, you will need to re-install Print Plug-In for Office to display the imagePROGRAF Print Plug-In toolbar/ribbon.
Re-install Print Plug-In for Office as follows:
|
3. 6. 6. Windows Software > Print Plug-In for Office >
To start from Microsoft Word
To start from Microsoft Word
- Start Microsoft Word.
- If Start imagePROGRAF Print Plug-In is displayed on the toolbar/ribbon, click it.

Important • If the imagePROGRAF Print Plug-In toolbar/ribbon is not displayed, refer to the following.• When Print Plug-In for Office is not displayed (3.6.5) - Check that the imagePROGRAF Print Plug-In toolbar/ribbon is displayed.
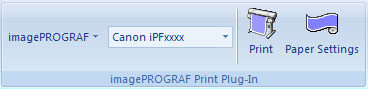
- Click the buttons on the toolbar/ribbon according to the items you want to set.
| Icon | Contents |

Menu
|
Displays the About, Help, and Special Settings dialog boxes.
You can change the settings using the Special Settings dialog box.
Refer to Configuring Special Settings (3.6.24) for details.
|
Printer list
|
Select Printer.
If you select Show All Printers, the imagePROGRAF printers will be displayed again. Select this when you want to display all printer drivers or update the display.
|

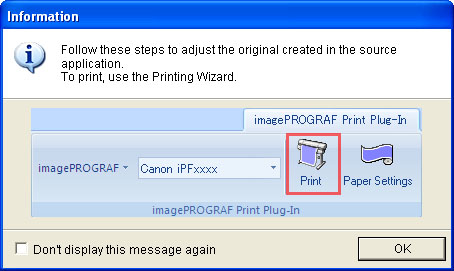
Print Button
|
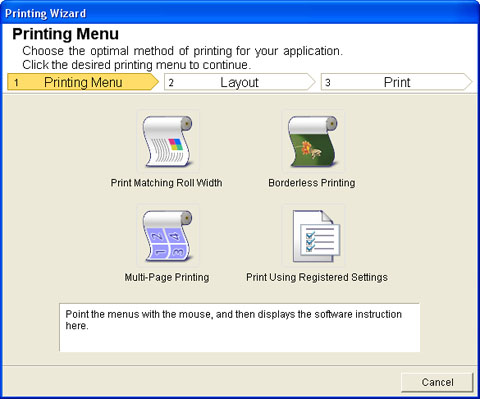
The print Wizard is displayed.
The settings Print Matching Roll Width, Borderless Printing, Multi-Page Printing, and Print Using Registered Settings can be set.
|

Paper Settings Button
|
Large-Format Wizard is displayed.
Settings for Portrait or Landscape Orientation can be set.
|
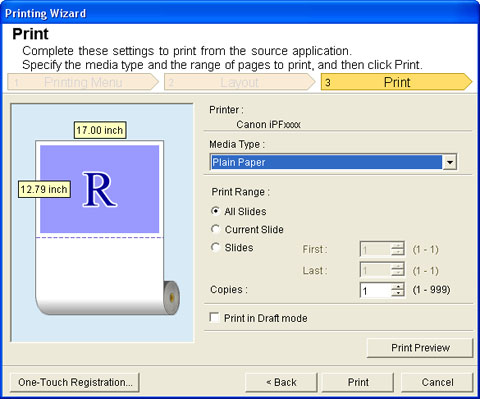
Printing Wizard dialog box
 |
| Important | ||
|
• If you want to change the display to another file or application while the Printing Wizard is open, close the Printing Wizard dialog box. Otherwise, you may not be able to change displays or operate the toolbar.
|
||
Large-Format Printing Wizard dialog box
 |
| Important | ||
|
• If you want to change the display to another file or application while the Large-Format Printing Wizard is open, close the Large-Format Printing Wizard dialog box. Otherwise, you may not be able to change displays or operate the toolbar/ribbon.
• The layout may collapse if you create a form using existing data. If that is the case, modify the data again.
|
||
3. 6. 7. Windows Software > Print Plug-In for Office >
Print Matching Roll Width (Word)
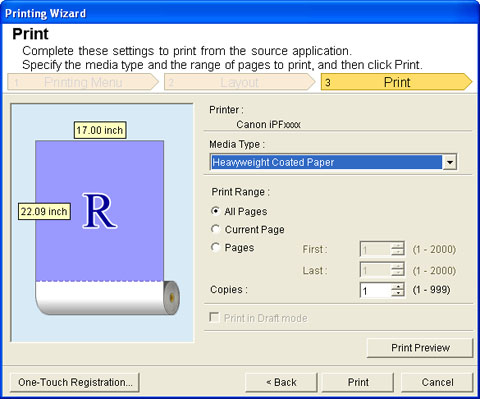
Print Matching Roll Width (Word)
Prints to the edge of the roll width. You can print large exhibits and posters, and also print Portrait and Landscape orientations made in Large-Format Printing Wizard.
- Start Microsoft Word.
- If Start imagePROGRAF Print Plug-In is displayed, click it.
- Click Print from the imagePROGRAF Print Plug-In toolbar/ribbon.
The Printing Wizard dialog box is displayed.
Important • If you want to change the display to another file or application while the Printing Wizard is open, close the Printing Wizard dialog box. Otherwise, you may not be able to change displays or operate the toolbar/ribbon. - Click Print Matching Roll Width.

- Select Roll Paper Width that is set in the printer.
- Select image size.
- Select layout.
- Select Next.
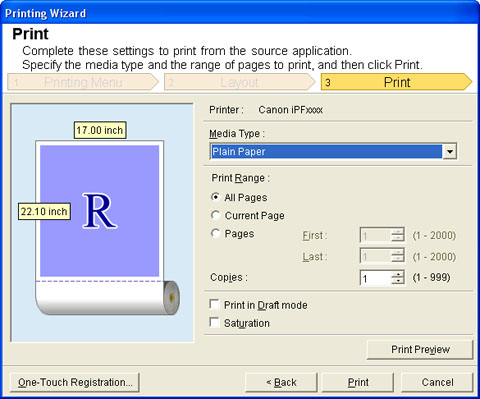
- Select Media Type.
- Select Print Range from All Pages, Current Page, and Pages.
If Pages is selected, enter the number of pages.
- Enter Copies.
Note • When Print in Draft mode is selected, printing is fast but the print quality is poor.• The settings are registered when the One-Touch Registration is pressed. This is convenient if you to need print multiple times using the same setting.• Press the Print Preview button to display the preview screen. You can check and make changes to the layout in the preview screen.• When you print to the edge of the roll width, the maximum length will be the lesser of 5.587 times the roll paper width, or 18.0m. - Press Print to start printing.
3. 6. 8. Windows Software > Print Plug-In for Office >
Borderless Printing (Word)
Borderless Printing (Word)
Prints up to the border of the media. Photos and posters can be printed without worrying about margins.
- Start Microsoft Word.
- If Start imagePROGRAF Print Plug-In is displayed, click it.
- Click Print from the imagePROGRAF Print Plug-In toolbar/ribbon.
The Printing Wizard dialog box is displayed.
Important • If you want to change the display to another file or application while the Printing Wizard is open, close the Printing Wizard dialog box. Otherwise, you may not be able to change displays or operate the toolbar/ribbon. - Click Borderless Printing.
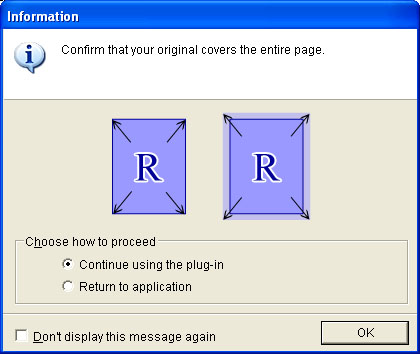
- A confirmation dialog box is displayed. If the data fills up the page, confirm that Continue using the plug-in is selected in Choose how to proceed and press OK.
Note • To adjust the data, select Return to application and press OK. Exit Print Plug-In for Office and return to the application.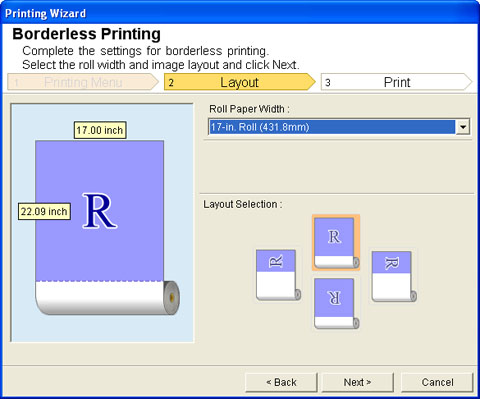
- Select Roll Paper Width that is set in the printer.
- Select Layout.
- Select Next.
- Select Media Type.
- Select Print Range from All Pages, Current Page, and Pages.
For Pages, insert the page number.
- Enter Copies.
Note • When Print in Draft mode is selected, printing is fast but the print quality is poor.• Press the One-Touch Registration button to register the settings. This is useful for multiple printing using the same settings.• Press the Print Preview button to display the preview screen. You can confirm and make changes to the layout in the preview screen.• The maximum length for Borderless Printing is the lesser of 5.587 times the roll paper width, or 18.0m. - Press Print to start printing.
3. 6. 9. Windows Software > Print Plug-In for Office >
Multi-Page Printing (Word)
Multi-Page Printing (Word)
Prints multiple pages as one page. You can print handouts into a single page, or print matter with many pages.
- Start Microsoft Word.
- If Start imagePROGRAF Print Plug-In is displayed, click it.
- Click Print from the imagePROGRAF Print Plug-In toolbar/ribbon.
The Printing Wizard dialog box is displayed.
Important • If you want to change the display to another file or application while the Printing Wizard is open, close the Printing Wizard dialog box. Otherwise, you may not be able to change displays or operate the toolbar/ribbon. - Click Multi-Page Printing.
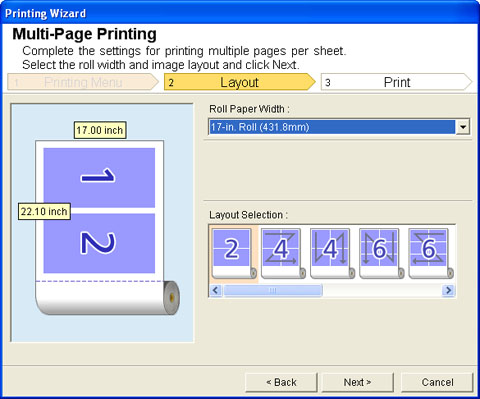
- Select the Roll Paper Width that is set in the printer.
- Select layout from Layout Selection.
- Select Next.
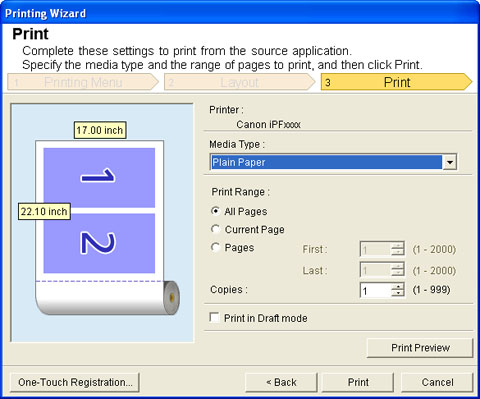
- Select Media Type.
- Select Print Range from All Pages, Current Page, and Pages.
If Pages is selected, enter the number of pages.
- Enter Copies.
Note • When Print in Draft mode is selected, printing is fast but the print quality is poor.• The settings are registered when the One-Touch Registration is pressed. This is convenient if you to need print multiple times using the same setting.• Press the Print Preview button to display the preview screen. You can check and make changes to the layout in the preview screen.• The maximum length for Multi-Page Printing is the lesser of 5.587 times the roll paper width, or 18.0m. - Press Print to start printing.
3. 6. 10. Windows Software > Print Plug-In for Office >
Register the settings(Word)
Register the settings(Word)
If you are going to print multiple times using the same setting, you can select One-Touch Registration. Registered settings can be recalled from Print Using Registered Settings.
- Set up to the Print screen from Print Matching Roll Width, Borderless Printing or Multi-Page Printing of Printing Menu.
- Click the One-Touch Registration button.
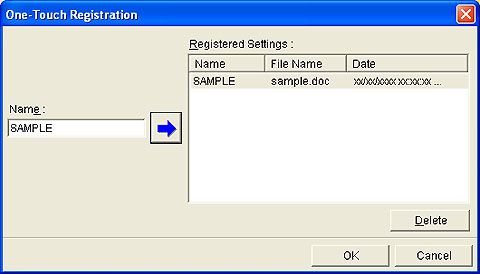
- Enter name in Name.
Up to 31 characters can be entered.
- Click
 . The name you entered is displayed in Registered Settings.
 - Click OK, and return to the Print screen.
- Click Print to print, and click Cancel to cancel the print.
Note • Clicking Cancel in the Print screen will not delete the registered settings.
3. 6. 11. Windows Software > Print Plug-In for Office >
Print Using Registered Settings (Word)
Print Using Registered Settings (Word)
- Start Microsoft Word.
- If Start imagePROGRAF Print Plug-In is displayed, click it.
- Click Print from the imagePROGRAF Print Plug-In toolbar/ribbon.
The Printing Wizard dialog box is displayed.
Important • If you want to change the display to another file or application while the Printing Wizard is open, close the Printing Wizard dialog box. Otherwise, you may not be able to change displays or operate the toolbar/ribbon. - Click Print Using Registered Settings.
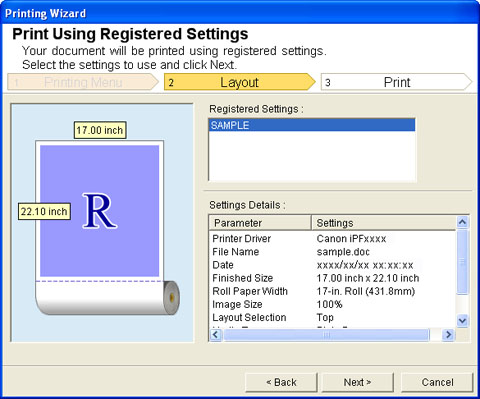
- Click the Next button.
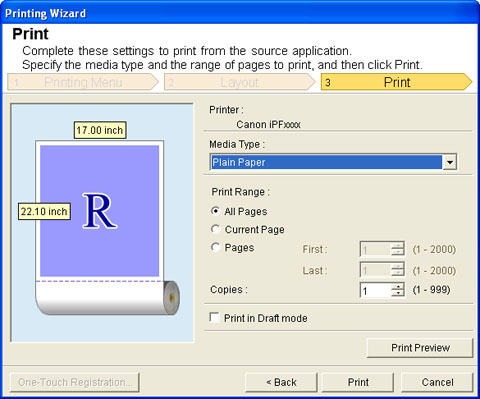
- Select Media Type.
- Select Print Range from All Pages, Current Page, or Pages.
If Pages is selected, enter the number of pages.
- Enter Copies.
Note • When Print in Draft mode is selected, printing is fast but the print quality is poor.• Press the Print Preview button to display the preview screen. You can check and make changes to the layout in the preview screen.• The maximum print length when printing with the registered settings is the lesser of 5.587 times the roll paper width, or 18.0m. - Press Print to start printing.
3. 6. 12. Windows Software > Print Plug-In for Office >
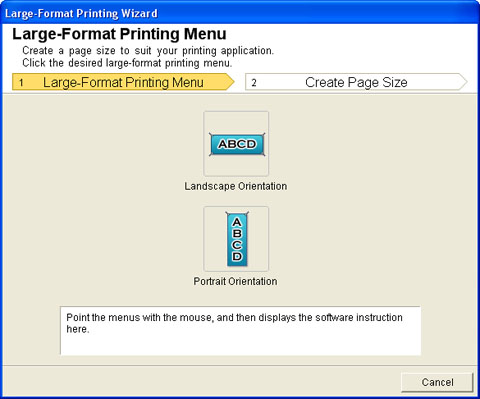
Portrait Orientation / Landscape Orientation (Word)
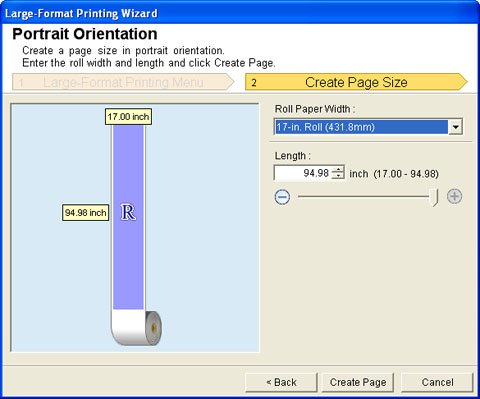
Portrait Orientation / Landscape Orientation (Word)
Print to the edge of the roll width. You can print large exhibits and posters, or print the Landscape or Portrait Orientation Page Sizes made in the Large-Format Printing Wizard.
| Create Page Size in Portrait or Landscape Orientation. | ||||||||||||||||||||||||
|
Use the Large-Format Printing Wizard to create portrait page sizes for Potrait Orientation, and landscape page sizes for Landscape Orientation.
|
3. 6. 13. Windows Software > Print Plug-In for Office >
To start from Microsoft PowerPoint
To start from Microsoft PowerPoint
- Start Microsoft PowerPoint.
- If Start imagePROGRAF Print Plug-In is displayed on the toolbar/ribbon, click it.
Important • If the imagePROGRAF Print Plug-In toolbar/ribbon is not displayed, refer to the following.• When Print Plug-In for Office is not displayed (3.6.5) - Check that the imagePROGRAF Print Plug-In toolbar/ribbon is displayed.
- Click the buttons on the toolbar/ribbon according to the items you want to set.
| Icon | Contents |
|
Menu
|
Displays the About, Help, and Special Settings dialog boxes. (See "Configuring Special Settings (3.6.24).") |
|
Printer list
|
Select Printer.
If you select Show All Printers, the imagePROGRAF printers will be displayed again. Select this when you want to display all printer drivers or update the display.
|
|
Print Button
|
The print Wizard is displayed.
The settings Print Matching Roll Width, Borderless Printing, Multi-Page Printing, and Print Using Registered Settings can be set.
|
|
Paper Settings Button
|
Large-Format Wizard is displayed.
Settings for Portrait or Landscape Orientation can be set.
|
Printing Wizard dialog box
|
| Important | ||
|
• If you want to change the display to another file or application while the Printing Wizard is open, close the Printing Wizard dialog box. Otherwise, you may not be able to change displays or operate the toolbar/ribbon.
|
||
| Note | ||
|
• If you open a password protected document as read-only, the Printing Wizard cannot be run.
|
||
Large-Format Printing Wizard dialog box
|
| Important | ||
|
• If you want to change the display to another file or application while the Large-Format Printing Wizard is open, close the Large-Format Printing Wizard dialog box. Otherwise, you may not be able to change displays or operate the toolbar/ribbon.
• The layout may collapse if you create a form using existing data. If that is the case, modify the data again.
|
||
| Note | ||
|
• If you open a password protected document as read-only, the Large-Format Printing Wizard cannot be run. Remove the password protection.
|
||
3. 6. 14. Windows Software > Print Plug-In for Office >
Print Matching Roll Width (PowerPoint)
Print Matching Roll Width (PowerPoint)
Prints to the edge of the roll width. You can print large exhibits and posters, and also print Portrait and Landscape orientations made in Large-Format Printing Wizard.
- Start Microsoft PowerPoint.
- If Start imagePROGRAF Print Plug-In is displayed, click it.
- Click Print from the imagePROGRAF Print Plug-In toolbar/ribbon.
The Printing Wizard dialog box is displayed.
Important • If you want to change the display to another file or application while the Printing Wizard is open, close the Printing Wizard dialog box. Otherwise, you may not be able to change displays or operate the toolbar/ribbon. - Click Print Matching Roll Width.
- Select Roll Paper Width that is set in the printer.
- Select image size.
- Select layout.
- Select Next.
- Select Media Type.
- Select Print Range from All Slides, Current Slide, and Slides.
If Slides is selected, enter the slide number.
- Enter Copies.
Note • When Print in Draft mode is selected, printing is fast but the print quality is poor.• The settings are registered when the One-Touch Registration is pressed. This is convenient if you to need print multiple times using the same setting.• Press the Print Preview button to display the preview screen. You can check and make changes to the layout in the preview screen.• When you print to the edge of the roll width, the maximum length will be the lesser of 14.22 times the roll paper width, or 18.0m. - Press Print to start printing.
3. 6. 15. Windows Software > Print Plug-In for Office >
Borderless Printing (PowerPoint)
Borderless Printing (PowerPoint)
Prints up to the border of the media. Photos and posters can be printed without worrying about margins.
- Start Microsoft PowerPoint.
- If Start imagePROGRAF Print Plug-In is displayed, click it.
- Click Print from the imagePROGRAF Print Plug-In toolbar/ribbon.
The Printing Wizard dialog box is displayed.
Important • If you want to change the display to another file or application while the Printing Wizard is open, close the Printing Wizard dialog box. Otherwise, you may not be able to change displays or operate the toolbar/ribbon. - Click Borderless Printing.
- A confirmation dialog box is displayed. If the data fills up the page, confirm that Continue using the plug-in is selected in Choose how to proceed and press OK.
Note • To adjust the data, select Return to application and press OK. Exit Print Plug-In for Office and return to the application. - Select Roll Paper Width that is set in the printer.
- Select Layout.
- Select Next.
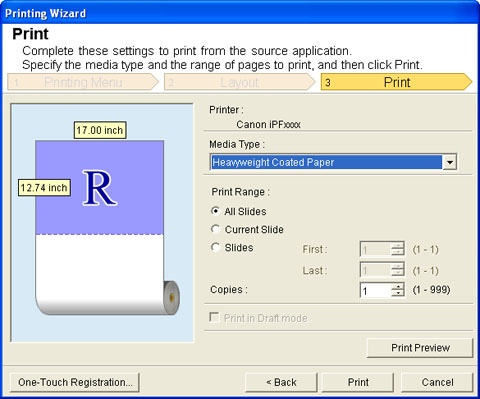
- Select Media Type.
- Select Print Range from All Slides, Current Slide, and Slides.
If Slides is selected, enter the slide number.
- Enter Copies.
Note • When Print in Draft mode is selected, printing is fast but the print quality is poor.• Press the One-Touch Registration button to register the settings. This is useful for multiple printing using the same settings.• Press the Print Preview button to display the preview screen. You can confirm and make changes to the layout in the preview screen.• The maximum length for Borderless Printing is the lesser of 14.22 times the roll paper width, or 18.0m. - Press Print to start printing.
3. 6. 16. Windows Software > Print Plug-In for Office >
Multi-Page Printing (PowerPoint)
Multi-Page Printing (PowerPoint)
Prints multiple pages as one page. You can print handouts into a single page, or print matter with many pages.
- Start Microsoft PowerPoint.
- If Start imagePROGRAF Print Plug-In is displayed, click it.
- Click Print from the imagePROGRAF Print Plug-In toolbar/ribbon.
The Printing Wizard dialog box is displayed.
Important • If you want to change the display to another file or application while the Printing Wizard is open, close the Printing Wizard dialog box. Otherwise, you may not be able to change displays or operate the toolbar/ribbon. - Click Multi-Page Printing.
- Select the Roll Paper Width that is set in the printer.
- Select layout from Layout Selection.
- Select Next.

- Select Media Type.
- Select Print Range from All Slides, Current Slide, and Slides.
If Slides is selected, enter the slide number.
- Enter Copies.
Note • When Print in Draft mode is selected, printing is fast but the print quality is poor.• The settings are registered when the One-Touch Registration is pressed. This is convenient if you to need print multiple times using the same setting.• Press the Print Preview button to display the preview screen. You can check and make changes to the layout in the preview screen.• The maximum length for Multi-Page Printing is the lesser of 14.22 times the roll paper width, or 18.0m. - Press Print to start printing.
3. 6. 17. Windows Software > Print Plug-In for Office >
Register the settings(PowerPoint)
Register the settings(PowerPoint)
If you are going to print multiple times using the same setting, you can select One-Touch Registration. Registered settings can be recalled from Print Using Registered Settings.
- Set up to the Print screen from Print Matching Roll Width, Borderless Printing or Multi-Page Printing of Printing Menu.
- Click the One-Touch Registration button.
- Enter name in Name.
Up to 31 characters can be entered.
- Click . The name you entered is displayed in Registered Settings.
- Click OK, and return to the Print screen.
- Click Print to print, and click Cancel to cancel the print.
Note • Clicking Cancel in the Print screen will not delete the registered settings.
3. 6. 18. Windows Software > Print Plug-In for Office >
Print Using Registered Settings (PowerPoint)
Print Using Registered Settings (PowerPoint)
- Start Microsoft PowerPoint.
- If Start imagePROGRAF Print Plug-In is displayed, click it.
- Click Print from the imagePROGRAF Print Plug-In toolbar/ribbon.
The Printing Wizard dialog box is displayed.
Important • If you want to change the display to another file or application while the Printing Wizard is open, close the Printing Wizard dialog box. Otherwise, you may not be able to change displays or operate the toolbar/ribbon. - Click Print Using Registered Settings.
- Click the Next button.

- Select Media Type.
- Select Print Range from All Slides, Current Slide, and Slides.
If Slides is selected, enter the slide number.
- Enter Copies.
Note • When Print in Draft mode is selected, printing is fast but the print quality is poor.• Press the Print Preview button to display the preview screen. You can check and make changes to the layout in the preview screen.• The maximum print length when printing with the registered settings is the lesser of 14.22 times the roll paper width, or 18.0m. - Press Print to start printing.
3. 6. 19. Windows Software > Print Plug-In for Office >
Portrait Orientation / Landscape Orientation (PowerPoint)
Portrait Orientation / Landscape Orientation (PowerPoint)
Print to the edge of the roll width. You can print large exhibits and posters, or print the Landscape or Portrait Orientation Page Sizes made in the Large-Format Printing Wizard.
| Create Page Size in Portrait or Landscape Orientation. | ||||||||||||||||||||||||
|
Use the Large-Format Printing Wizard to create portrait page sizes for Potrait Orientation, and landscape page sizes for Landscape Orientation.
|
3. 6. 20. Windows Software > Print Plug-In for Office >
To start from Microsoft Excel
To start from Microsoft Excel
- Start Microsoft Excel.
- If Start imagePROGRAF Print Plug-In is displayed on the toolbar/ribbon, click it.
Important • If the imagePROGRAF Print Plug-In toolbar/ribbon is not displayed, refer to the following.• When Print Plug-In for Office is not displayed (3.6.5) - Check that the imagePROGRAF Print Plug-In toolbar/ribbon is displayed.
- Click the buttons on the toolbar/ribbon according to the items you want to set.
| Icon | Contents |
|
Menu
|
Displays the About, Help, and Special Settings dialog boxes. (See "Configuring Special Settings (3.6.24).") |
|
Printer list
|
Select Printer.
If you select Show All Printers, the imagePROGRAF printers will be displayed again. Select this when you want to display all printer drivers or update the display.
|
|
Print Button
|
The print Wizard is displayed.
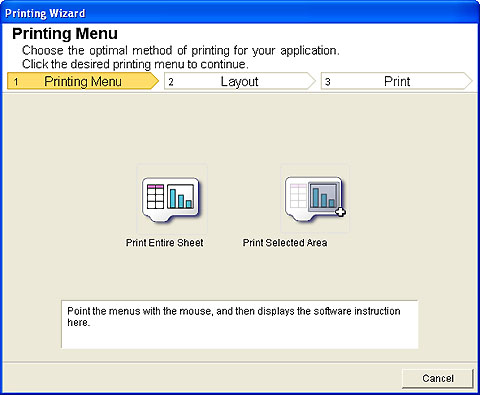
The settings Print Entire Sheet and Print Selected Area can be set.
|
Printing Wizard dialog box
 |
| Important | ||
|
• If you want to change the display to another file or application while the Printing Wizard is open, close the Printing Wizard dialog box. Otherwise, you may not be able to change displays or operate the toolbar/ribbon.
• The Printing Wizard will not start if you click the Print button on the toolbar/ribbon while editing a cell.
• When more than one worksheet is selected, the Printing Wizard cannot be run. Select only one worksheet and click Print again.
• When an object is selected, the Printing Wizard is not started if you click the Print button on the toolbar/ribbon.
• If the paper size in Excel is blank, the Printing Wizard cannot be run. From the File menu in Excel, select Page Setup and check Paper size.
|
||
| Note | ||
|
• If you click the Print button with a graph selected, a message dialog box will appear asking if you want to continue printing. If you click No, you will return to the application.
• If you click the Print button with a page break set, a message dialog box will appear asking if you want to continue printing. If you click No, you will return to the application. If you do not use the set page break, check the page break preview and change the setting.
• If you click the Print button with a page range set, a message dialog box will appear asking if you want to continue printing. If you click No, you will return to the application. If you do not use the set page range, check the page break preview and change the setting.
• If you click the Print button with a worksheet or cell protected, a message dialog box will appear asking if you want to continue printing. If you click No, you will return to the application. If you want to change the setting, remove the protection from the worksheet or cell.
|
||
3. 6. 21. Windows Software > Print Plug-In for Office >
Print Entire Sheet (Excel)
Print Entire Sheet (Excel)
For resizing the entire sheet to fit the roll width. Choose this option to enlarge the currently displayed sheet before printing.
- Start Microsoft Excel.
- If Start imagePROGRAF Print Plug-In is displayed, click it.
- Click Print from the imagePROGRAF Print Plug-In toolbar/ribbon.
Important • When more than one worksheet is selected, the Printing Wizard cannot be run. Select only one worksheet and click Print again.If a print area is set, a confirmation message dialog box will appear.To print the entire sheet, cancel the setting of the print area.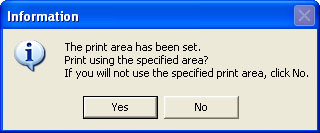 The Printing Wizard dialog box is displayed.
 - Click Print Entire Sheet.
A message will appear informing you that analysis is in progress.
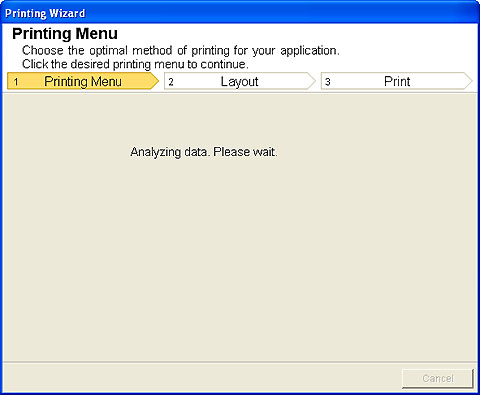 The Layout menu will appear automatically.
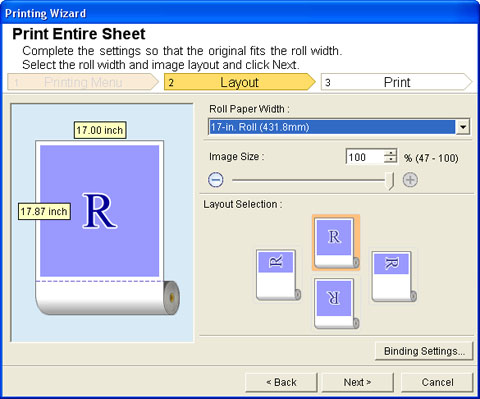
Note • If data analysis requires time, a message dialog will appear. If you select No, you will return to the application. - Select Roll Paper Width that is set in the printer.
- Select image size.
- Select layout.
- To configure Binding, click the Binding Settings button.
Refer to Configuring Binding (Excel) (3.6.23) for details on the procedure for configuring Binding.
- Select Next.
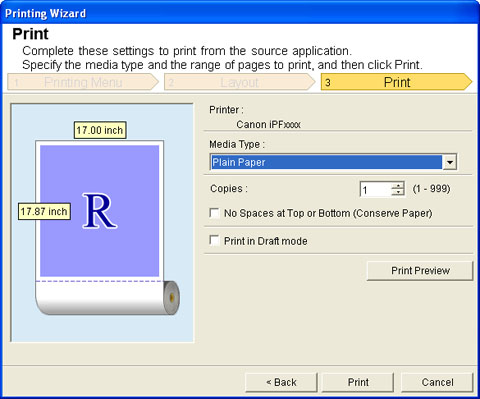
- Select Media Type.
- Enter Copies.
Note • When Print in Draft mode is selected, printing is fast but the print quality is poor.• Press the Print Preview button to display the preview screen. You can check and make changes to the layout in the preview screen.• When you print to the edge of the roll width, the maximum print length is 18.0m. - If the upper and lower margins are too wide, check No Spaces at Top or Bottom (Conserve Paper).
The upper and lower margins can be checked in Print Preview.
- Press Print to start printing.
Important • If divided into plural pages, try reducing the data size or the range you select.• You cannot run Print or Print Preview if you select it for a worksheet with no data displayed.
3. 6. 22. Windows Software > Print Plug-In for Office >
Print Selected Area (Excel)
Print Selected Area (Excel)
For resizing the selected range of cells to fit the roll width. Choose this option to enlarge a particular part of the sheet before printing.
- Start Microsoft Excel.
- If Start imagePROGRAF Print Plug-In is displayed, click it.
- Click Print from the imagePROGRAF Print Plug-In toolbar/ribbon.
Important • When more than one worksheet is selected, the Printing Wizard cannot be run. Select only one worksheet and click Print again.If a print area is set, a confirmation message dialog box will appear.To print the selected area, cancel the setting of the print area.The Printing Wizard dialog box is displayed. - Click Print Selected Area.
Important • If only one cell is selected, Print Selected Area cannot be selected.A message will appear informing you that analysis is in progress.The Layout menu will appear automatically.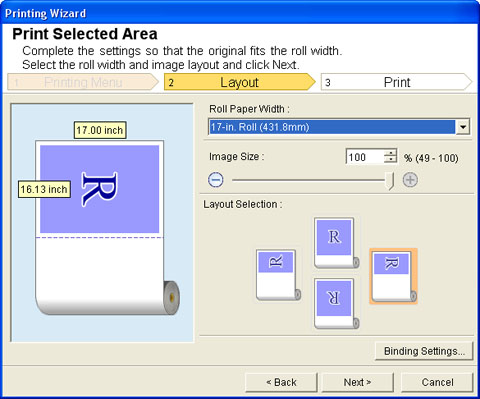
Important • If the range selected in Excel 2007/2010 is too large, it will not be possible to analyze the data. Select a smaller range and then run the analysis.Note • If data analysis requires time, a message dialog will appear. If you select No, you will return to the application. - Select Roll Paper Width that is set in the printer.
- Select image size.
- Select layout.
- To configure Binding, click the Binding Settings button.
Refer to Configuring Binding (Excel) (3.6.23) for details on the procedure for configuring Binding.
- Select Next.

- Select Media Type.
- Enter Copies.
Note • When Print in Draft mode is selected, printing is fast but the print quality is poor.• Press the Print Preview button to display the preview screen. You can check and make changes to the layout in the preview screen.• When you print to the edge of the roll width, the maximum print length is 18.0m. - If the upper and lower margins are too wide, check No Spaces at Top or Bottom (Conserve Paper).
The upper and lower margins can be checked in Print Preview.
- Press Print to start printing.
Important • If divided into plural pages, try reducing the data size or the range you select.• You cannot run Print or Print Preview if you select it for a worksheet with no data displayed.
3. 6. 23. Windows Software > Print Plug-In for Office >
Configuring Binding (Excel)
Configuring Binding (Excel)
- Configure the settings up to Layout Selection in the Layout screen in Print Entire Sheet or Print Selected Area.
- Click the Binding Settings button.
Important • You cannot click the Binding Settings button in the following situations.• When the Image Size is set to 100%• When a graph is selected• When page breaks have been set• When a sheet or cell is protectedOpen the Binding Settings dialog box.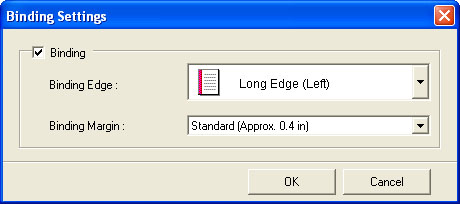
- If the Binding checkbox is not checked, select it to turn binding on.
- Select Binding Edge.
- Select Binding Margin.
- Click the OK button.
Return to the Layout screen.
 Check that the Binding settings are applied in the preview screen.
 - Configure the settings in the Printing Wizard dialog box.
3. 6. 24. Windows Software > Print Plug-In for Office >
Configuring Special Settings
Configuring Special Settings
- Click imagePROGRAF in the toolbar, and select Special Settings.
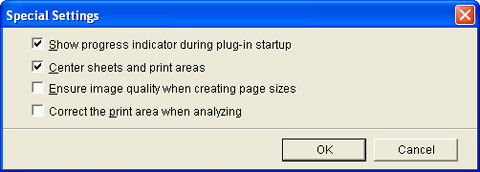
- Turn the checkbox for the item you want to change on or off.
Item Details Show progress indicator during plug-in startup When this setting is off, hides the progress indicator that appears while the plug-in is starting up. Center sheets and print areas When this setting is off, printing is performed without changing the position. When this setting is on, printing is performed with the top, bottom, left, and right margins layed out equally. When this setting is off, printing is performed without changing the position. This function is only valid in Microsoft Excel.Ensure image quality when creating page sizes When this setting is on, documents are created at the maximum size. This reduces the enlargement ratio during actual printing, which minimizes degradation of the quality of photos, etc. This function is only valid in [ Microsoft PowerPoint.Correct the print area when analyzing For data that cannot be processed with usual data analysis, the print area is corrected and then the data is processed. When data analysis fails, you may be able to print by turning on this checkbox. This function is only valid in Microsoft Excel. - Click OK to close the Special Settings dialog box.