11. Maintenance and Consumables
   11. 5. Other Maintenance

  1. Preparing to Transfer the Printer
  2. Updating the Firmware

11. 5. 1. Maintenance and Consumables > Other Maintenance >
Preparing to Transfer the Printer
To protect the internal parts in transit, always follow these steps before transferring the printer to a new location.
Refer to the Setup Guide for details on packing the printer and installing it after transfer.
Important
•  Avoid tilting the printer excessively in transit. This may cause ink in the printer to leak and cause stains. If it is necessary to tilt the printer in transit, contact your Canon dealer.
•  It is not possible to prepare the printer for transfer if the Display Screen requests you to replace the Maintenance Cartridge or check the remaining capacity. Replace the Maintenance Cartridge before transfer preparations. In this case, you will need one new Maintenance Cartridge.  (See "Replacing the Maintenance Cartridge (11.3.2).")
Note
•  Depending on the state of the printer, part replacement may be necessary when preparing to transfer the printer (that is, when you execute the printer menu item to prepare for transfer).
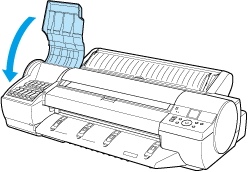
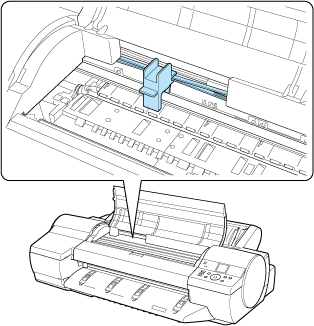
  Remove paper
  1. Remove the paper.
    Rolls  (See "Removing the Roll from the Printer (6.2.5).")
    Sheets  (See "Removing Sheets (6.3.3).")

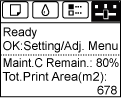
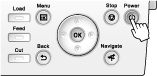
  Access the Prep.MovePrinter menu
  1. On the Tab Selection screen of the Control Panel, press or to select the Settings/Adj. tab ().
    Note
    •  If the Tab Selection screen is not displayed, press the Menu button.
  2. Press the OK button.
    The Set./Adj. Menu is displayed.
  3. Press or to select Prep.MovePrinter, and then press the OK button to display the confirmation screen.
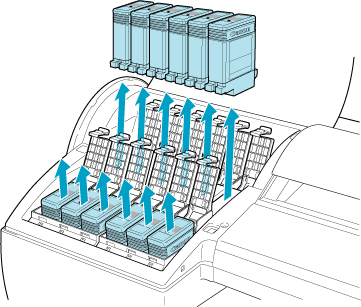
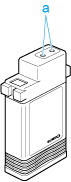
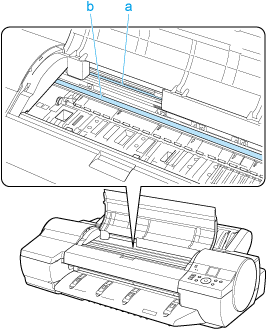
  4. Press or to select Yes, and then press the OK button.
    Once preparations are finished, a message on the Display Screen requests you to open the Ink Tank Cover.
    Important
    •  If consumables must be replaced, the message "Consumables must be replaced. Call for service." is shown on the Display Screen and preparation is not possible. If this message is displayed, press the OK button and contact your Canon dealer for assistance.

  Remove the Ink Tank
  1. Open the Ink Tank Cover.
  2. Lift the ink tank lock levers and remove all ink tanks.
    Put the ink tanks in a plastic bag and seal it.
    Important
    •  Store the ink tanks you removed with the ink holes (a) facing up. Otherwise, ink may leak and cause stains.
  3. Close all ink tank lock levers, and then close the Ink Tank Cover.
    At this point, ink is drawn out from inside the tubes.
    Important
    •  Do not remove the Maintenance Cartridge during this process. Ink may leak out.
    When the process is finished, "Completed! Turn Power Off!!" is displayed.

  Pack the printer
  1. Press the Power button and turn off the printer.
    Important
    •  Turn off the printer before you unplug it. It may damage the printer if you unplug it before it is off and transfer it in that state. If you accidentally unplug the printer, plug it in again, reinstall the ink tanks, and follow this procedure again.
  2. Disconnect the power cord and interface cable.
  3. Open the Top Cover.
  4. Pinch the Belt together, insert it between the Belt Stopper, and affix the Belt Stopper to the Carriage Shaft.
    Important
    •  Do not touch the Linear Scale (a) or Carriage Shaft (b). This may stain your hands and damage the printer.
    Note
    •  Here, the Belt Stopper is the one that was removed and stored after initial installation.
  5. Close the Top Cover.
  6. Tape down printer covers to secure them, in the reverse order of tape removal during installation.
  7. Repack the Roll Holder, Holder Stopper, and printer in shipping materials, and then package them in a shipping box.

11. 5. 2. Maintenance and Consumables > Other Maintenance >
Updating the Firmware
Update the printer firmware to take advantage of new and improved printer functions.
  Confirming the firmware version
  1. On the Tab Selection screen of the Control Panel, press or to select the Settings/Adj. tab ().
    Note
    •  If the Tab Selection screen is not displayed, press the Menu button.
  2. Press the OK button.
    The Set./Adj. Menu is displayed.
  3. Press or to select Printer Info, and then press the OK button.
  4. Press or to select System Info, and then press the OK button.
    The firmware version is displayed.

  Updating the Firmware
To obtain the latest firmware, visit the Canon website. If the firmware available online is newer than the installed firmware, update the printer firmware. For details on downloading and updating the firmware, visit the Canon website.