10. 6. 1. Network Setting > Other Settings >
Specifying Printer-Related Information
Specifying Printer-Related Information
- Start the web browser and enter the following URL in the Location (or Address ) box to display the RemoteUI page.
http://printer IP address or name/Example: http://xxx.xxx.xxx.xxx/
- Select Administrator Mode and click Logon.
- If a password has been set on the printer, enter the password.
- Click Information in the Device Manager menu at left to display the Information page.
- To display the relevant settings page, click Edit in the upper-right corner of Device Information or Security, depending on what information you want to specify.
To change the administrator password, click the Change Password button in the Security group.
- Refer to the table of settings for device information and security as you complete these settings.
Security setting items are displayed when you click the Change Password button in the Security group.Device Information SettingsSecurity Settings
Item Details Default Setting New Password Enter the new password. (0-9999999)blank Confirm Enter the new password again to confirm it. (0-9999999)blank *1: On the Security settings screen, besides entering a password, you can specify other security-related information, such as IP address-based SNMP or TCP usage restrictions, MAC address-based access restrictions, or IPP and FTP authentication settings. - Click OK to activate the settings.
10. 6. 2. Network Setting > Other Settings >
Configuring the Communication Mode Manually
Configuring the Communication Mode Manually
This topic gives instructions for configuring the communication mode manually.
- On the Tab Selection screen of the Control Panel, press
 or
or  to select the Settings/Adj. tab (
 ).
).


Note • If the Tab Selection screen is not displayed, press the Menu button. - Press the OK button.
The Set./Adj. Menu is displayed.
- Press
 or
or  to select Interface Setup, and then press the OK button.
 - Press
 or
or  to select Ethernet Driver, and then press the OK button.
 - Press
 or
or  to select Auto Detect, and then press the OK button.
 - Press
 or
or  to select Off, and then press the OK button.
The display reverts to the Ethernet Driver menu.
 - Press
 or
or  to select Comm.Mode, and then press the OK button.
 - Press
 or
or  to select the communication mode, and then press the OK button.
The display reverts to the Ethernet Driver menu.
 - Press
 or
or  to select Ethernet Type, and then press the OK button.
 - Press
 or
or  to select the Ethernet type, and then press the OK button.
The display reverts to the Ethernet Driver menu.
 - Press
 or
or  to select Spanning Tree, and then press the OK button.
 - Press
 or
or  to enable or disable spanning tree support, and then press the OK button.
The display reverts to the Ethernet Driver menu.
 - Press the Menu button.
After the confirmation message is displayed, press the OK button.The new settings will take effect after the printer restarts.

| Note | ||
|
• Communication can also be configured on the Network page in RemoteUI.
|
||
10. 6. 3. Network Setting > Other Settings >
Email Notification When Printing is Finished or Errors Occur
Email Notification When Printing is Finished or Errors Occur
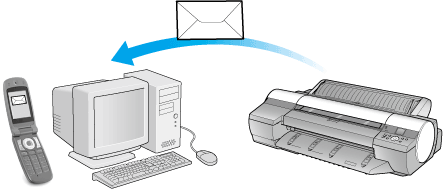
The printer can notify you of the printer status by email. Even when you are away from the printer, you can know when printing is finished or if errors occur. Receive notification via email on your mobile phone or at your computer.
 |
| Note | ||
|
• For details on email notification using imagePROGRAF Status Monitor (in Windows), refer to the imagePROGRAF Status Monitor help.
• Mail server authentication is only supported with imagePROGRAF Status Monitor.
|
||
10. 6. 4. Network Setting > Other Settings >
Initializing the Network Settings
Initializing the Network Settings
Use RemoteUI to restore the network settings to the default values as follows.
| Important | ||
|
• Initializing the network settings will also restore the default value of the printer's IP address. As a result, the RemoteUI page cannot be displayed in the web browser after this procedure.
• For instructions on reconfiguring the IP address, see "Configuring the IP Address on the Printer (10.3.1)."
• For details on RemoteUI, see "Using RemoteUI (10.2.1)."
|
||
- Start the web browser and enter the following URL in the Location (or Address ) box to display the RemoteUI page.
http://printer IP address or name/Example: http://xxx.xxx.xxx.xxx/
- Select Administrator Mode and click Logon.
- If a password has been set on the printer, enter the password.
- Click Network in the Device Manager menu at left to display the Network page.
- Click Reset to Default settings in the lower-right corner of the Network Interface group.
- After confirming the message, click OK to restore the network settings to the default values.
| Note | ||
|
• You can also use imagePROGRAF Device Setup Utility or the Control Panel to restore the default network settings.
|
||