10. 5. 1. Network Setting > Mac OS X Settings >
Configuring the Destination in TCP/IP Networks (Macintosh)
Configuring the Destination in TCP/IP Networks (Macintosh)
| Important | ||
|
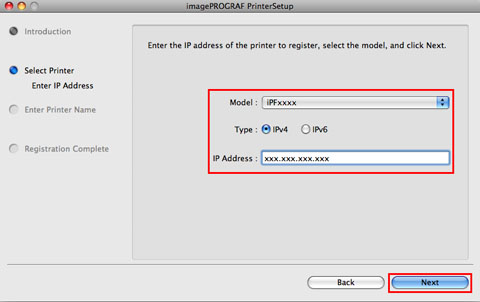
• If you use the printer in a TCP/IP network, make sure the printer's IP address is configured correctly. (See "Configuring the IP Address Using the Printer Control Panel (10.3.3).")
|
||
| Configuring the Destination (Mac OS X) | |||||
|
10. 5. 2. Network Setting > Mac OS X Settings >
Configuring the Destination for Bonjour Network (Macintosh)
Configuring the Destination for Bonjour Network (Macintosh)
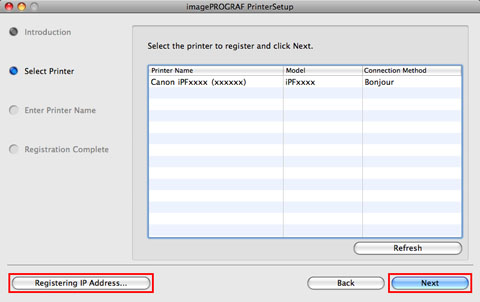
Follow the steps below to configure the destination if you are using the printer in a network that uses the Bonjour function.
| Important | ||
|
• Bonjour and IP Print (Auto) do not support printing to a printer on other network groups that require a router for connection. Make sure the computer and printer are on the same network. For information about network settings, ask your network administrator.
• By default, Bonjour is activated on the printer. You can activate or deactivate the Bonjour function or change the printer name by using RemoteUI. For instructions on changing it, see "Using RemoteUI (10.2.1)."
|
||
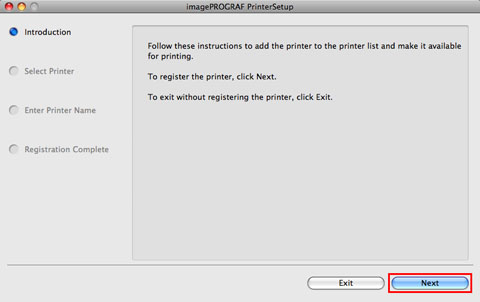
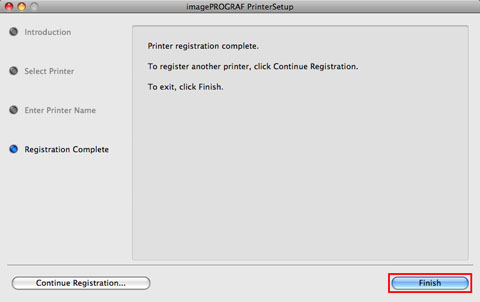
- Navigate to Applications > Canon Utilities > imagePROGRAF PrinterSetup and double-click imagePROGRAF PrinterSetup.app.
- Click Next.
- Select the printer to register and click Next.
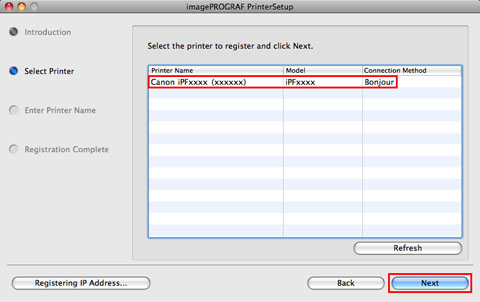
- Complete Printer Name and Location as desired and click Register.
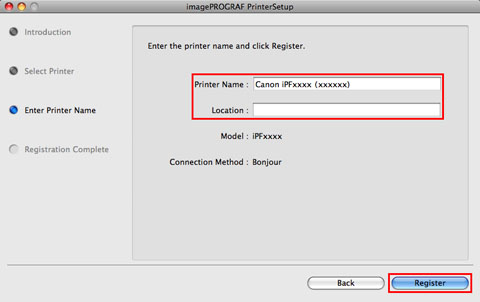
- Click Finish.
10. 5. 3. Network Setting > Mac OS X Settings >
Configuring the Destination for AppleTalk Networks (Macintosh)
Configuring the Destination for AppleTalk Networks (Macintosh)
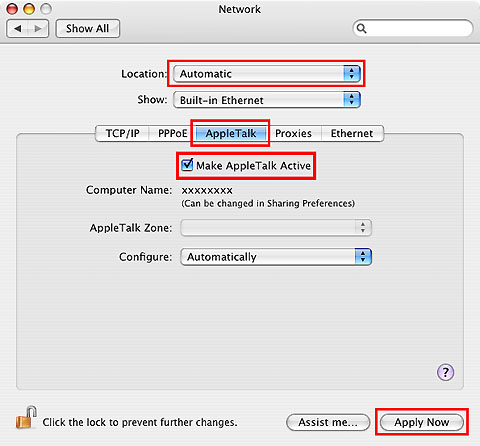
To print over an AppleTalk network, activate the AppleTalk protocol and configure the destination as follows.
| Activating AppleTalk on the printer | ||||||||||||||||||||||
|
 or
or  to select the Settings/Adj. tab (
 ).
).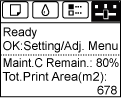
 or
or  to select Interface Setup, and then press the OK button.
| Configuring the Destination (Mac OS X) | |||||||||||
|
10. 5. 4. Network Setting > Mac OS X Settings >
Configuring the Printer's AppleTalk Network Settings
Configuring the Printer's AppleTalk Network Settings
- Start the web browser and enter the following URL in the Location (or Address ) box to display the RemoteUI page.
http://printer IP address or name/Example: http://xxx.xxx.xxx.xxx/
- Select Administrator Mode and click Logon.
- If a password has been set on the printer, enter the password.
- Click Network in the Device Manager menu at left to display the Network page.
- Click Edit in the upper-right corner of the AppleTalk group to display the Edit AppleTalk Protocol Settings page.
- Refer to the AppleTalk Settings Items table to complete the settings.
AppleTalk Settings Items*1: The object name you have specified in Name is displayed in Printer Setup Utility (or Print Center ) in Mac OS X 10.2.8–10.4. If you use multiple printers in the same zone, assign a unique name to each printer. By default, the network interface name is Canon NB-18GB (xxxxxx). (Here, xxxxxx is the last six digits of the printer's MAC address.)*2: If zones have been created on the network, enter the name of the printer's zone. If there are no zones, leave the asterisk * entry (for the default zone) as it is. If you enter a network zone name that does not match created zones, the printer will not be detected by Macintosh computers. Consult your network administrator for information on zone names.
- Click OK to display the Network page.