10. 4. 1. Network Setting > NetWare Settings >
Configuring NetWare Network Settings
Configuring NetWare Network Settings
Follow these steps to configure the network environment when using the printer in a NetWare network.
| Important | ||
|
• To configure network settings, you must be logged in with administrative rights such as Administrator. We recommend that your network administrator configure the network settings.
|
||
- Configure the Ethernet frame type to be used in communication by the printer with the computer.
For details on configuring settings, see "Specifying the Printer's Frame Type (10.4.2)."
- Configure the NetWare print service such as the print server and queue.
For details on configuring settings, see "Specifying NetWare Print Services (10.4.3)."
- Configure the NetWare protocol details other than the frame type.
For details on configuring settings, see "Configuring the Printer's NetWare Network Settings With RemoteUI (10.4.4)."After completing the settings of this procedure, configure the settings on each computer for printing in a NetWare network.
- Connect to the NetWare network.
Install the NetWare client software on all computers that are to perform printing, and log in to the NetWare server or tree. For details on connecting, refer to the documentation for NetWare or your operating system.
- Install the printer driver.
According to the instructions of your network administrator, install the printer driver on all computers that are to perform printing. When installing, select Network Printer as the printer connection destination, and select the queue created when configuring the NetWare print service.
- Configure the printer port by the following procedure. If you configured the printer connection destination while installing the printer driver, this procedure is unnecessary.
1.Open the Printers and Faxes (or Printers, Devices and Printers ) window.2.Right-click the icon of this printer and choose Properties (For Windows 7 and Windows Vista, Printer Properties ) to open the printer properties window.3.Click the Port (or Advanced ) tab to display the Port (or Advanced ) sheet.4.Configure the print destination port to the print queue created when configuring the NetWare print service.
10. 4. 2. Network Setting > NetWare Settings >
Specifying the Printer's Frame Type
Specifying the Printer's Frame Type
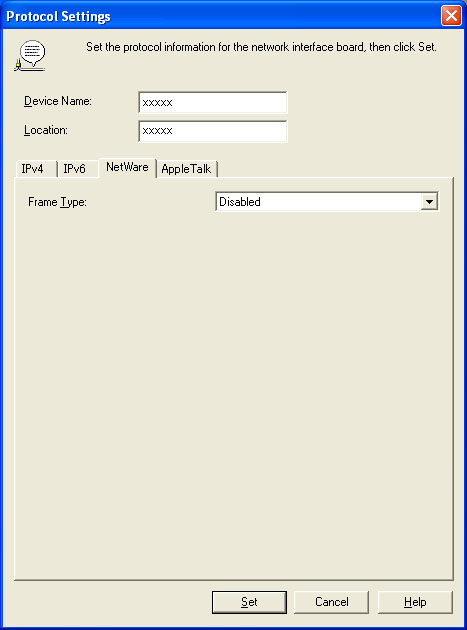
To enable communication between the printer and computers on your network, specify the Ethernet frame type in your NetWare environment.
Follow the steps below to specify the frame type by using imagePROGRAF Device Setup Utility or the printer Control Panel.
| Important | ||
|
• Before specifying the frame type, make sure the printer is on and connected to the network.
|
||
| Note | ||
|
• You can specify the frame type by using RemoteUI if the printer's IP address is configured.
• For instructions on installing imagePROGRAF Device Setup Utility, see "Installing imagePROGRAF Device Setup Utility (3.10.2).".
|
||
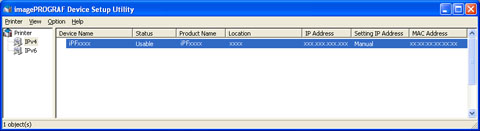
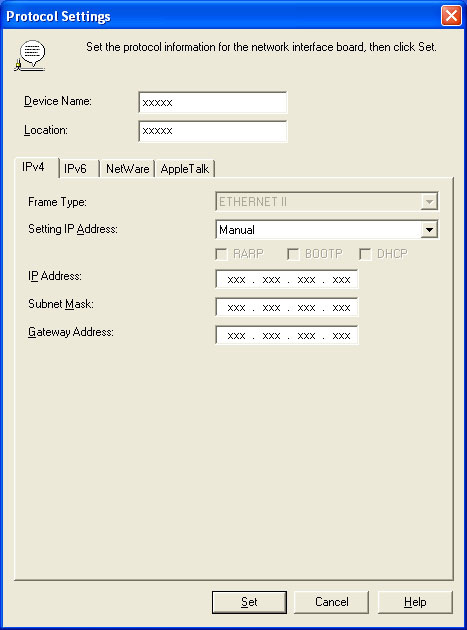
| Specifying the frame type using imagePROGRAF Device Setup Utility | ||||||||
|
| Specifying the frame type using the printer Control Panel | |||||||||||||||||
|
 or
or  to select the Settings/Adj. tab (
 ).
).
 or
or  to select Interface Setup, and then press the OK button.
10. 4. 3. Network Setting > NetWare Settings >
Specifying NetWare Print Services
Specifying NetWare Print Services
Before printing in a NetWare network, you must configure print services such as print servers, print queues, and so on. You can configure the print service settings from a computer using any of the following Novell software provided with NetWare.
•NWADMIN
•PCONSOLE
| Important | ||
|
• If you use NWADMIN to configure the print service settings, Novell Client (the Novell NetWare client software) must be installed as the client software application.
• NetWare networking is unsupported in Windows Vista, Windows Server 2008 and Windows 7.
|
||
This topic gives instructions for configuring NetWare print services. The order of this procedure may vary depending on the environment.
| Using NWADMIN or PCONSOLE to set up the print server | |||||||||||||||
|
Use NWADMIN to set up the print server if NDS queue server mode or remote printer mode is used.
Use PCONSOLE to set up the print server if bindery queue server mode or remote printer mode is used.
|
10. 4. 4. Network Setting > NetWare Settings >
Configuring the Printer's NetWare Network Settings With RemoteUI
Configuring the Printer's NetWare Network Settings With RemoteUI
Follow the steps below to configure NetWare protocol settings other than the frame type by using RemoteUI.
| Note | ||
|
• For details on RemoteUI, see "Using RemoteUI (10.2.1)."
|
||
- Start the web browser and enter the following URL in the Location (or Address ) box to display the RemoteUI page.
http://printer IP address or name/Example: http://xxx.xxx.xxx.xxx/
- Select Administrator Mode and click Logon.
- If a password has been set on the printer, enter the password.
- Click Network in the Device Manager menu at left to display the Network page.
- Click Edit in the upper-right corner of the NetWare group to display the Edit NetWare Protocol Settings page.
- Refer to the NetWare Settings Items table to complete the settings.
NetWare Settings Items
Item Details Default Setting Frame Type Specify the type of frame to use in NetWare. Disabled NCP Burst Mode Activate this setting to use NCP Burst Mode. This mode supports fast data transfer when printing in queue server mode. Normally, leave the setting On.On Print Application Choose the print service. The print service selected here is enabled. Multiple print services cannot be enabled simultaneously.• Bindery PServer• RPrinter• NDS PServer• NPrinterNDS PServer Packet Signature Select If Requested by Server to use packet signature. If Requested by Server Bindery PServer File Server Name Specify the name of a file server that has a NetWare print server. (0–47 characters)— Print Server Name Specify the name of a NetWare print server. (0–47 characters)— Print Server Password Set a password for the print server. (0–20 characters)— Polling Interval Specify the interval to confirm jobs. (1–15 seconds)5 RPrinter Print Server Name Specify the name of a NetWare print server. (0–47 characters)— Printer Number Specify the number of the printer connected to the NetWare print server. (0-15)0 NDS PServer Tree Name Specify the name of an NDS tree that has a NetWare print server. (0–32 characters)— Context Name Specify the name of a context that has a NetWare print server. (0–255 characters)— Print Server Name Specify the name of a NetWare print server. (0–64 characters)— Print Server Password Set a password for the print server. (0–20 characters)— Polling Interval Specify the interval to confirm jobs. (1–255 seconds)5 NPrinter Print Server Name Specify the name of a NetWare print server. (0–47 characters)— Printer Number Specify the number of the printer connected to the NetWare print server. (0-254)0 - Complete the following settings based on the selected service.
•If you have selected Bindery PServer: Queue Server Mode (Using a Bindery Print Server)1.In File Server Name, enter the file server name.2.In Print Server Name, enter the name of the print server created in "Specifying NetWare Print Services (10.4.3)."3.In Print Server Password, enter the password of the print server created in "Specifying NetWare Print Services (10.4.3)."4.In Polling Interval, specify the interval at which the printer checks the NetWare print queue.•If you have selected RPrinter: Remote Printer Mode (Using a Bindery Print Server)•If you have selected NDS PServer: Queue Server Mode (Using an NDS Print Server)1.In Tree Name and Context Name, enter the tree and context name of the print server.2.In Print Server Name, enter the name of the print server created in "Specifying NetWare Print Services (10.4.3)."3.In Print Server Password, enter the password of the print server created in "Specifying NetWare Print Services (10.4.3)."4.In Polling Interval, specify the interval at which the printer checks the NetWare print queue.•If you have selected NPrinter: Remote Printer Mode (Using a NDS Print Server)1.In Print Server Name, enter the advertising name of the print server created in "Specifying NetWare Print Services (10.4.3)." Usually, the advertising name is the same as the name of the print server.2.In Printer Number, enter the same printer number specified in "Specifying NetWare Print Services (10.4.3)."
- Click OK to display the Network page.