3. 10. 1. Windows Software > Device Setup Utility >
imagePROGRAF Device Setup Utility
imagePROGRAF Device Setup Utility
imagePROGRAF Device Setup Utility is a utility to establish communication between the printer and your computer by completing relevant settings. After the printer is installed, for example, you can use imagePROGRAF Device Setup Utility to complete the network settings initially.
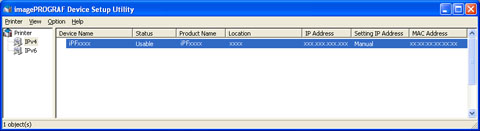 |
•Starting imagePROGRAF Device Setup Utility will show a list of printers found on the network. In this list, select the printer (specifically, the printer's MAC address) that you want to set up, and then configure the basic settings from your computer, such as the printer's IP address and the network frame type.
•You can see which printers are online in the network by checking the printer list. Communication between your computer and these printers is possible.
| Note | ||
|
• We recommend that your network or printer administrator complete the setup work using imagePROGRAF Device Setup Utility.
• For details, refer to the imagePROGRAF Device Setup Utility help.
|
||
3. 10. 2. Windows Software > Device Setup Utility >
Installing imagePROGRAF Device Setup Utility
Installing imagePROGRAF Device Setup Utility
Install imagePROGRAF Device Setup Utility from the User Software CD-ROM provided with the printer as follows:
| Important | ||
|
• In Windows 2000/Windows XP/Windows Server 2003/Windows Vista/Windows Server 2008/Windows 7, you must log on with administrative rights equivalent to the Administrator account.
|
||
- Insert the User Software CD-ROM in the CD-ROM drive.
- On the Setup Menu window, click Install Individual Software.
- Click Install in imagePROGRAF Device Setup Utility.
- Follow the instructions on the screen to proceed with the installation.
3. 10. 3. Windows Software > Device Setup Utility >
Configuring the IP Address Using imagePROGRAF Device Setup Utility
Configuring the IP Address Using imagePROGRAF Device Setup Utility
On a computer running Windows, you can use imagePROGRAF Device Setup Utility provided with the printer to configure the printer's IP address. This topic describes how to configure the IP address using imagePROGRAF Device Setup Utility.
| Important | ||
|
• To configure network settings, you must be logged in with administrative rights such as Administrator account. We recommend that your network administrator configure the network settings.
|
||
| Note | ||
|
• For instructions on installing imagePROGRAF Device Setup Utility, see "Installing imagePROGRAF Device Setup Utility (3.10.2)."
|
||
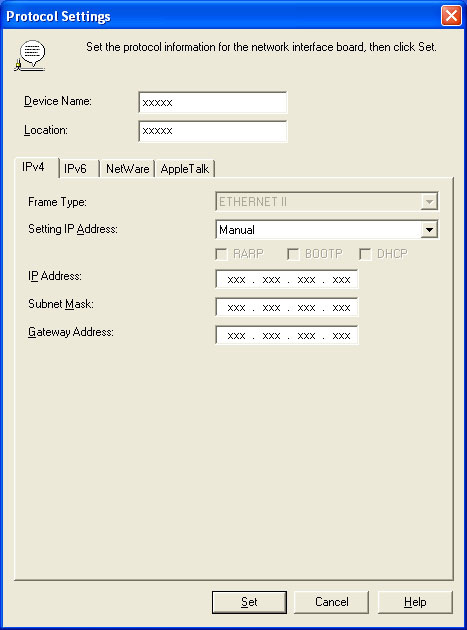
| When specifying an IPv4 IP address | |||||||
|
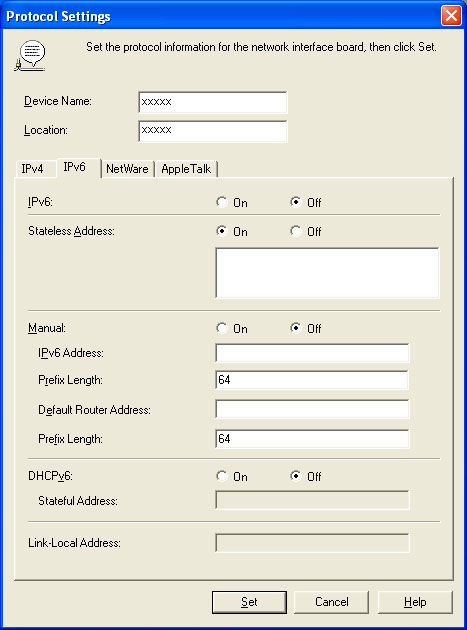
| When specifying an IPv6 IP address | |||||||
|