2. 8. 1. Enhanced Printing Options > Tiling and multiple pages per sheet >
Printing Multiple Originals Next to Each Other
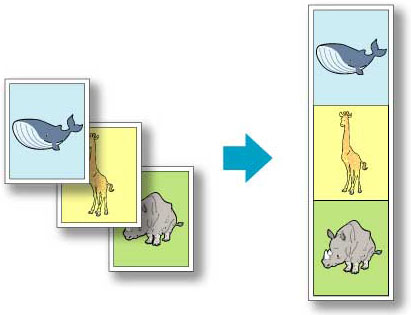
Printing Multiple Originals Next to Each Other
By arranging originals from word-processing or spreadsheet programs or web browser screen shots next to each other on single sheets, you can create highly expressive presentation materials, easy-to-understand meeting materials, and a variety of other printed documents.
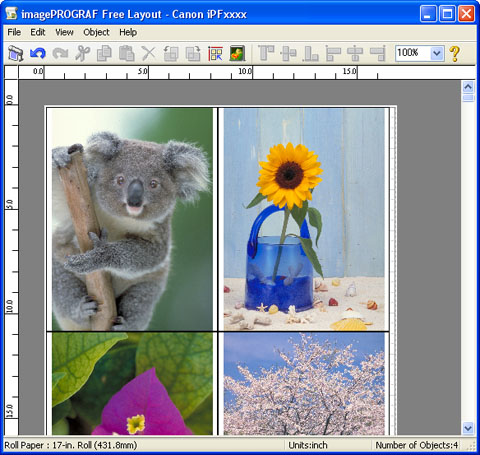
•Free Layout (Windows)
Besides combining multiple pages in a single-page layout, you can combine originals from multiple files—even multiple source applications—in a single-page layout.
 |
| Note | ||
|
• Free Layout cannot be used in 64-bit version of Windows.
|
||
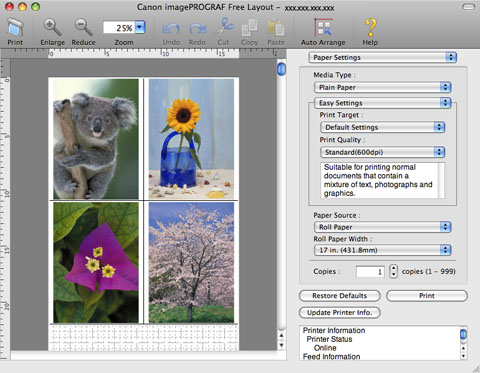
•imagePROGRAF Free Layout (Macintosh)
Besides combining multiple pages in a single-page layout, you can combine originals from multiple files—even multiple source applications—in a single-page layout.
 |
For instructions on arranging originals from multiple applications, refer to the following topics.
2. 8. 2. Enhanced Printing Options > Tiling and multiple pages per sheet >
Printing Multiple Originals Next to Each Other (Windows)
Printing Multiple Originals Next to Each Other (Windows)
| Note | ||
|
• Free Layout cannot be used in 64-bit version of Windows.
|
||
- Choose Print in the application menu.
- Select the printer in the dialog box, and then display the printer driver dialog box.(See "Accessing the Printer Driver Dialog Box from Applications (3.1.6)")
- Make sure the Main sheet is displayed.
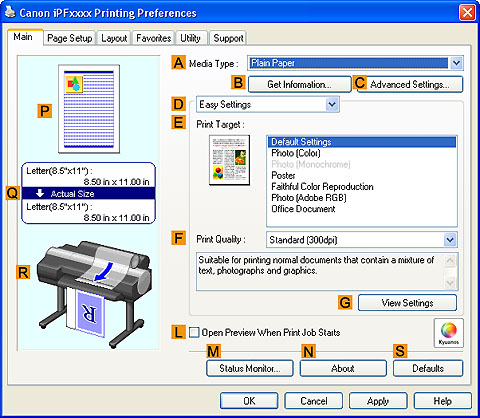
- Click the Layout tab to display the Layout sheet.
- Select the APage Layout check box.
- Click Free Layout in the APage Layout list.
- When you attempt to print, the imagePROGRAF Free Layout window is displayed. (At this point, the document will not be printed yet.)
- Edit and rearrange the image in the imagePROGRAF Free Layout window as desired.

Note • Without closing the imagePROGRAF Free Layout window, repeat steps 1–7 to arrange originals from multiple applications on the same page.• For instructions on editing and rearranging images, refer to the imagePROGRAF Free Layout help topic. - Print from the imagePROGRAF Free Layout menu.
| Note | ||
|
• For details on imagePROGRAF Free Layout functions, refer to Free Layout.
|
||
2. 8. 3. Enhanced Printing Options > Tiling and multiple pages per sheet >
Printing Multiple Originals Next to Each Other (Mac OS X)
Printing Multiple Originals Next to Each Other (Mac OS X)
This topic describes how to use the Free Layout function to arrange multiple originals next to each other before printing.
- Choose Print in the application menu.
- Access the Page Setup pane.
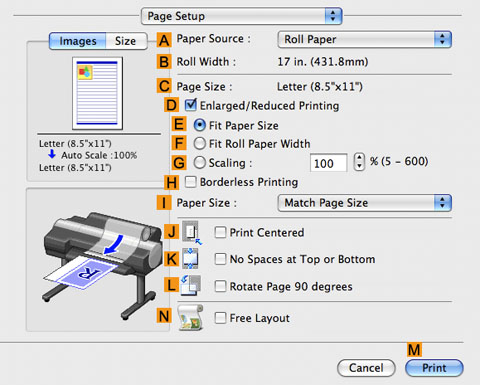
- Select the NFree Layout check box.
- Click MPrint.
- The Canon imagePROGRAF Free Layout window is displayed.
- Edit and rearrange the image in the Canon imagePROGRAF Free Layout window as desired.
Note • Without closing the Canon imagePROGRAF Free Layout window, repeat steps 1 to 4 to arrange originals from multiple applications on the same page.• For instructions on editing and rearranging images, refer to the Canon imagePROGRAF Free Layout help topic. - Print from the Canon imagePROGRAF Free Layout menu.
Note • For details on Canon imagePROGRAF Free Layout functions, refer to Free Layout.
2. 8. 4. Enhanced Printing Options > Tiling and multiple pages per sheet >
Printing Multiple Pages Continuously
Printing Multiple Pages Continuously
•Roll paper (banner)
 |
| Important | ||
|
• This feature is only available with rolls. It cannot be used when printing on sheets.
• During banner printing, settings for conserving paper, number of copies, borderless printing, enlargement or reduction, and other layout-related settings are disregarded.
|
||
For instructions on borderless printing of photos and images at actual size, refer to the following topics, as appropriate for your computer and operating system.
2. 8. 5. Enhanced Printing Options > Tiling and multiple pages per sheet >
Printing Multiple Pages Continuously (Windows)
Printing Multiple Pages Continuously (Windows)
This topic describes how to print multiple pages as a single continuous image, without margins between pages.
| Important | ||
|
• This feature is only available with rolls. It cannot be used when printing on sheets.
• During banner printing, settings for conserving paper, number of copies, borderless printing, enlargement or reduction, and other layout-related settings are disregarded.
|
||
- Choose Print in the application menu.
- Select the printer in the dialog box, and then display the printer driver dialog box.(See "Accessing the Printer Driver Dialog Box from Applications (3.1.6)")
- Make sure the Main sheet is displayed.
- In the AMedia Type list, click the type of paper that is loaded.
- Click the Page Setup tab to display the Page Setup sheet.

- Select and click a roll paper in the LPaper Source list.
- Click NRoll Paper Options to display the Roll Paper Options dialog box.
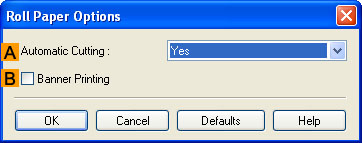
- Select the BBanner Printing check box.
- Click OK.
- Confirm the print settings and print as desired.
Note • For tips on confirming print settings, see "Confirming Print Settings (3.1.3)"
2. 8. 6. Enhanced Printing Options > Tiling and multiple pages per sheet >
Printing Multiple Pages Continuously (Mac OS X)
Printing Multiple Pages Continuously (Mac OS X)
This topic describes how to print multiple pages as a single continuous image, without margins between pages.
| Important | ||
|
• This feature is only available with rolls. It cannot be used when printing on sheets.
• During banner printing, settings for conserving paper, number of copies, borderless printing, enlargement or reduction, and other layout-related settings are disregarded.
|
||
- This sets the BFormat for and CPaper Size.
Note • The configuration method varies depending on the OS and application software you are using.If Page Setup is displayed in the application menu, the settings are configured by opening the Page Attributes dialog box from Page Setup. If it is not displayed, the settings are configured in the upper part of the printer driver displayed when you select Print from the application software menu.
- Select the printer in the APrinter list.
- Click the original size in the FPaper Size list.
- If you configured the settings using the Page Attributes dialog box, click FOK to close the dialog box, and then select Print from the application software menu.
- Access the Main pane.
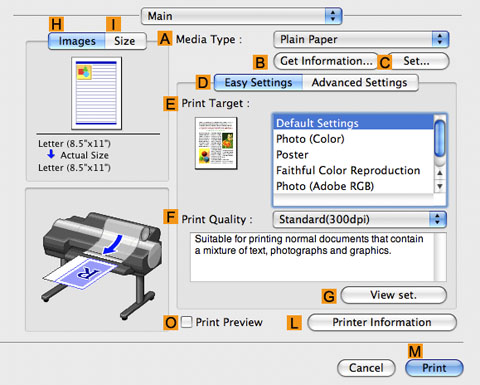
- In the AMedia Type list, click the type of paper that is loaded.
- Make your selection in the EPrint Target list.
- Make your selection in the FPrint Quality list.
- Access the Page Setup pane.
- Click Roll Paper (Banner) in the APaper Source list.
- Confirm the print settings, and then click MPrint to start printing.
Note • For tips on confirming print settings, see "Confirming Print Settings (4.1.3)"
2. 8. 7. Enhanced Printing Options > Tiling and multiple pages per sheet >
Printing Multiple Pages Per Sheet
Printing Multiple Pages Per Sheet
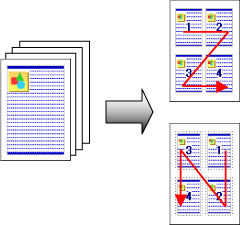
To conserve paper, you can print several pages of the original on a single sheet by reducing the original and dividing the sheet into areas for each page.
 |
•Page Layout
Specify a number of pages of the original to print on a single sheet, in a layout of multiple pages per sheet.
| Important | ||
|
• This function cannot be combined with the following options.
• Borderless Printing
• Scaling Originals (Windows)
• Banner Printing (Windows)
• When printing using this function, the Print Centered setting is disabled.
|
||
| Note | ||
|
• You can print up to 16 pages of the original on a single sheet.
• You can also change the page layout order and print page boundary lines, as desired.
|
||
For instructions on printing multiple pages per sheet, refer to the following topics, as appropriate for your computer and operating system.
2. 8. 8. Enhanced Printing Options > Tiling and multiple pages per sheet >
Printing Multiple Pages Per Sheet (Windows)
Printing Multiple Pages Per Sheet (Windows)
This topic describes how to print four pages of originals together on a single sheet based on the following example.
•Document: Any Type
•Page size: A3 (297.0×420.0 mm [11.7×16.5 in])
•Paper: Roll
•Paper type: Plain Paper
•Roll paper width: A2/A3 roll (420.0 mm [16.5 in])
- Choose Print in the application menu.
- Select the printer in the dialog box, and then open the printer driver dialog box.(See "Accessing the Printer Driver Dialog Box from Applications (3.1.6)")
- Make sure the Main sheet is displayed.
- In the AMedia Type list, select the type of paper that is loaded. In this case, click Plain Paper.
- Make your selection in the EPrint Target list.
- Make your selection in the FPrint Quality list.
- Click the Page Setup tab to display the Page Setup sheet.
- In APage Size, click the size of the original as specified in the application software. In this case, click ISO A3 or Letter (8.5"x11").
- Select and click a roll paper in the LPaper Source list.
- Select the width of the loaded roll in the MRoll Paper Width list—in this case, ISO A2/A3 Roll (420.0mm).
- Click the Layout tab to display the Layout sheet.
- Select the APage Layout check box.
- Click 4 Pages/Sheet in the APage Layout list.
Note • You can select the layout order for placing four pages on a sheet and a frame border in the Page Layout Printing dialog box by clicking BSet. - Confirm the print settings and print as desired.
Note • For tips on confirming print settings, see "Confirming Print Settings (3.1.3)"
2. 8. 9. Enhanced Printing Options > Tiling and multiple pages per sheet >
Printing Multiple Pages Per Sheet (Mac OS X)
Printing Multiple Pages Per Sheet (Mac OS X)
This topic describes how to print four pages of an original on a single sheet, based on the following example.
•Document: Any Type
•Page size: A3 (297.0 × 420.0 mm [11.7 × 16.5 in])
•Paper: Roll paper
•Paper type: Plain Paper
•Roll paper width: A2/A3 roll (420.0 mm [16.5 in])
- This sets the BFormat for and CPaper Size.
Note • The configuration method varies depending on the OS and application software you are using.If Page Setup is displayed in the application menu, the settings are configured by opening the Page Attributes dialog box from Page Setup.If it is not displayed, the settings are configured in the upper part of the printer driver displayed when you select Print from the application software menu. - Select the printer in the APrinter list.
- In the FPaper Size list, click the size of the original. In this case, click ISO A3.
- If you configured the settings using the Page Attributes dialog box, click FOK to close the dialog box, and then select Print from the application software menu.
- Access the Layout pane.
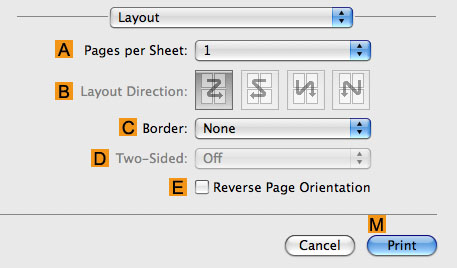
- Click 4 in the APages per Sheet list.
Note • You can choose the layout order and specify a boundary line for the four pages in BLayout Direction and CBorder. - Access the Main pane.
- In the AMedia Type list, select the type of paper that is loaded. In this case, click Plain Paper.
- Make your selection in the EPrint Target list.
- Make your selection in the FPrint Quality list.
- Access the Page Setup pane.
- Select and click a roll paper in the APaper Source list.
- Make sure the width of the loaded roll is displayed in the BRoll Width list—in this case, ISO A2/A3 (420.0mm).
Note • If the width of the roll loaded in the printer is not shown in BRoll Width, click LPrinter Information on the Main pane to update the printer information. - Make sure CPage Size shows the original size as specified in CPaper Size in the Page Attributes dialog box—in this case, ISO A3.
- Confirm the print settings, and then click MPrint to start printing.
Note • For tips on confirming print settings, see "Confirming Print Settings (4.1.3)"
2. 8. 10. Enhanced Printing Options > Tiling and multiple pages per sheet >
Printing Posters in Sections
Printing Posters in Sections
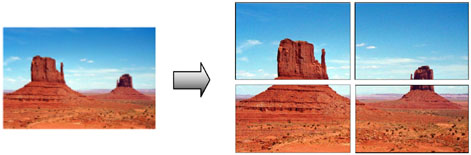
You can enlarge an original to print it in sections on several sheets. By assembling the printed sheets, you can create a poster larger than the maximum supported paper size of the printer.
 |
•Page Layout
Choose poster printing.
| Important | ||
|
• When printing using this function, the Print Centered, Watermark, No Spaces at Top or Bottom (Conserve Paper), and Page Options settings are disabled.
|
||
For instructions on printing large posters, refer to the following topics, as appropriate for your computer and operating system.
•Printing Large Posters (Windows) (2.8.11)
| Note | ||
|
• This method of poster printing is supported in Windows.
|
||
2. 8. 11. Enhanced Printing Options > Tiling and multiple pages per sheet >
Printing Large Posters (Windows)
Printing Large Posters (Windows)
You can enlarge an original to print it in sections on several sheets. By assembling the printed sheets, you can create a poster larger than the maximum supported paper size of the printer. This topic describes how to enlarge an A2 original for printing it in sections on four sheets, based on the following example.
•Document: Poster
•Page size: A2 (420.0×594.0 mm [16.5 × 23.4 in])
•Paper: Sheets
•Paper Size: A2 (420.0 × 594.0 mm [16.5 × 23.4 in])
- Choose Print in the application menu.
- Select the printer in the dialog box, and then display the printer driver dialog box.(See "Accessing the Printer Driver Dialog Box from Applications (3.1.6)")
- Make sure the Main sheet is displayed.
- In the AMedia Type list, select the type of paper that is loaded.
- Click Poster in the EPrint Target list.
- Click the Page Setup tab to display the Page Setup sheet.
- In APage Size, click the size of the original as specified in the application. In this case, click ISO A2.
- Click Manual in the LPaper Source list.
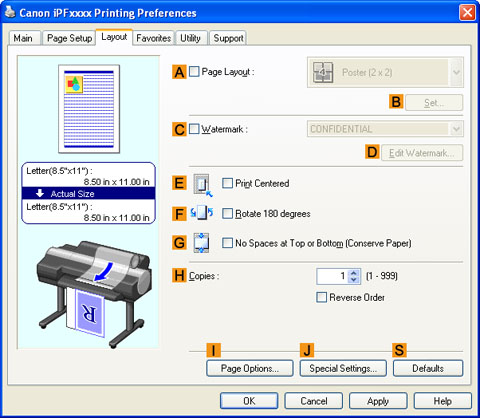
- Click the Layout tab to display the Layout sheet.
- Select the APage Layout check box.
- Click Poster (2 x 2) in the APage Layout list.
Note • Follow the steps below to print only a portion of the poster as divided for printing.• Click BSet under APage Layout to display the Pages to Print dialog box.• On the Pages to Print dialog box, clear the check boxes of the portion you do not want to print.• Click OK to close the Pages to Print dialog box. - Confirm the print settings and print as desired.
Note • For tips on confirming print settings, see "Confirming Print Settings (3.1.3)"