3. 4. 1. Windows Software > Color imageRUNNER Enlargement Copy >
The Features of Color imageRUNNER Enlargement Copy
The Features of Color imageRUNNER Enlargement Copy
•Allows the document scanned with the Color imageRUNNER to be automatically enlarged and printed.
•You can perform basic printer settings such as printer selection, media type and output profile selection, and matching methods, in addition to borderless printing and enlargement/reduction process without growing through the printer driver.
| Note | ||
|
• The media type, image size, detailed media settings, and the printer settings can cause the actual print output to differ from the Color imageRUNNER Enlargement Copy settings.
|
||
3. 4. 2. Windows Software > Color imageRUNNER Enlargement Copy >
Operating Environment
Operating Environment
•Compatible Operating System
Windows 2000, Windows XP, Windows Server 2003, Windows Vista, Windows Server 2008, Windows 7
•Software that requires installation
imagePROGRAF Printer Driver
| Note | ||
|
• This function is not available on 64-bit version of Windows.
|
||
3. 4. 3. Windows Software > Color imageRUNNER Enlargement Copy >
Starting Color imageRUNNER Enlargement Copy
Starting Color imageRUNNER Enlargement Copy
| To start by selecting Printers and Faxes from the start button | |||||||
|
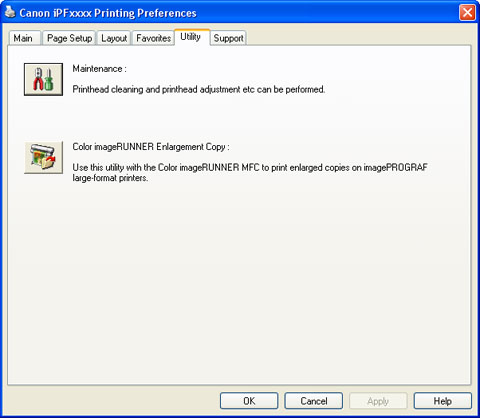
| To start by selecting Color imageRUNNER Enlargement Copy from the start button | ||
|

3. 4. 4. Windows Software > Color imageRUNNER Enlargement Copy >
Color imageRUNNER Enlargement Copy Dialog Box
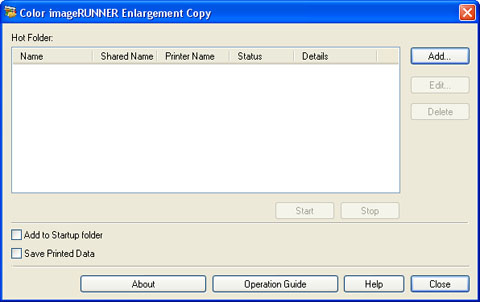
Color imageRUNNER Enlargement Copy Dialog Box
 |
| Note | ||
|
• For the step to open the Color imageRUNNER Enlargement Copy dialog box, see "Starting Color imageRUNNER Enlargement Copy (3.4.3)."
|
||
•Hot Folder
The hot folder list appears.
•Add Button
Click the button to open the Easy Setup Wizard dialog box so that you can add a hot folder.
•Edit Button
From the Hot Folder list, select a hot folder and click the button to open the Add/Edit Hot Folder dialog box that allows you to edit the hot folder.
•Delete Button
From the Hot Folder list, select a hot folder and click the button to delete the hot folder.
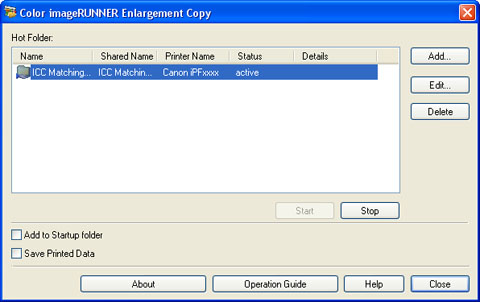
•Start Button
Clicking the button changes the status of the selected inactive Hot Folder to active.
•Stop Button
Clicking the button changes the status of the selected active Hot Folder to inactive.
•Add to Startup folder
Register the application in the Windows startup menu.
•Save Printed Data
Automatically saves printed data.
•About Button
Click the button to display the name and the version number of the utility.
•Operation Guide Button
Click the button to display the Color imageRUNNER Enlargement Copy Setup Manual.
3. 4. 5. Windows Software > Color imageRUNNER Enlargement Copy >
Hot Folder
Hot Folder
•When transferred to the PC's hot folder, the document data scanned with the Color imageRUNNER is printed in enlarged size from the printer according to the print conditions set in the hot folder.
•You can create a new hot folder, edit or delete an existing one, and set print conditions at will.
| Note | ||
|
• You can create up to 20 hot folders.
|
||
3. 4. 6. Windows Software > Color imageRUNNER Enlargement Copy >
Creating a New Hot Folder
Creating a New Hot Folder
- Open the Color imageRUNNER Enlargement Copy dialog box, and then click the Add button.
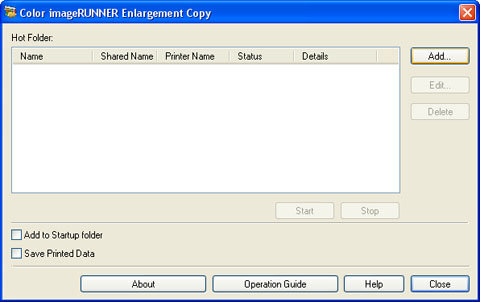

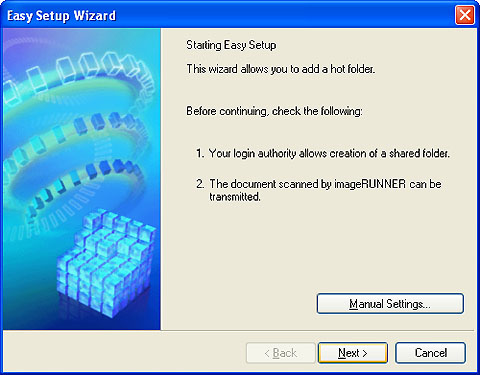
Note • For the step to open the Color imageRUNNER Enlargement Copy dialog box, see "Starting Color imageRUNNER Enlargement Copy (3.4.3)." - The Easy Setup Wizard dialog box displays.
Click the Next button.
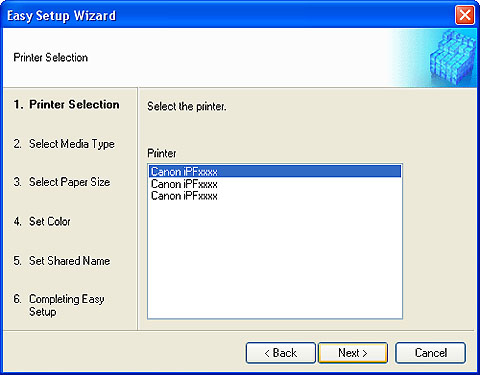
- Select the type of printer to use.
Click the Next button.
- Select the media type to print.
Note • If the Borderless Printing checkbox is checked, only media types that can be used for borderless printing are displayed in the list.Click the Next button.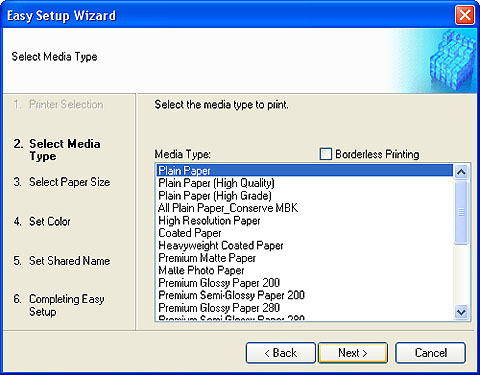
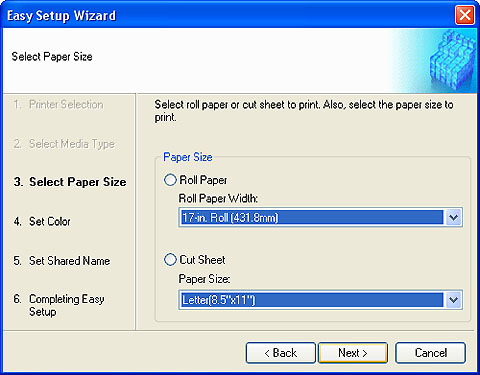
- Select roll paper or cut sheet to print. Also, select the media size to print.
Click the Next button.
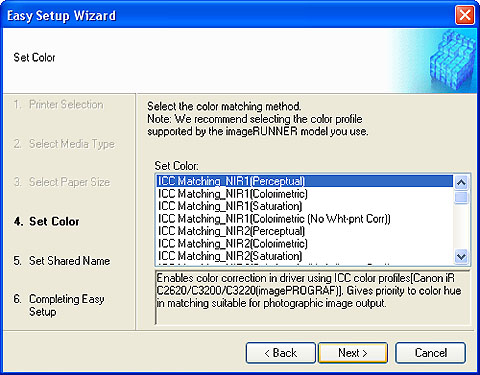
- Select the color matching method.
Click the Next button.
- To receive a document scanned with the Color imageRUNNER, you need to share a folder. Enter the folder shared name in Shared Name.
Click the Next button.
Note • This shared name is used as the name of the hot folder.• You cannot use the Back button, after clicking the Next button here.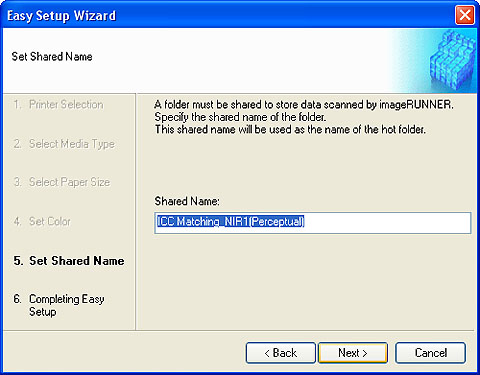
- Click Finish button to close the Easy Setup Wizard dialog box.
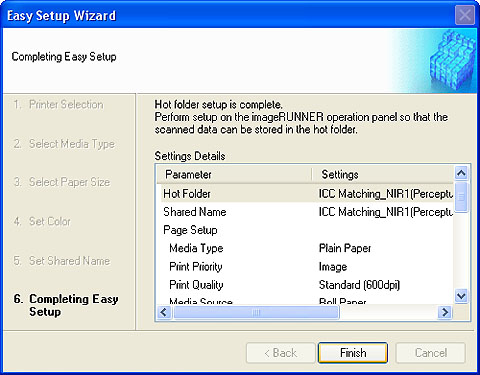
The hot folder you have created appears in the Hot Folder list in the Color imageRUNNER Enlargement Copy dialog box.
3. 4. 7. Windows Software > Color imageRUNNER Enlargement Copy >
Specifying an Existing Shared Folder as a Hot Folder
Specifying an Existing Shared Folder as a Hot Folder
- Share the folder you want to specify as a hot folder.
- Open the Color imageRUNNER Enlargement Copy dialog box, and then click the Add button.
Note • For the step to open the Color imageRUNNER Enlargement Copy dialog box, see "Starting Color imageRUNNER Enlargement Copy (3.4.3)." - The Easy Setup Wizard dialog box displays.
Click the Manual Settings button.

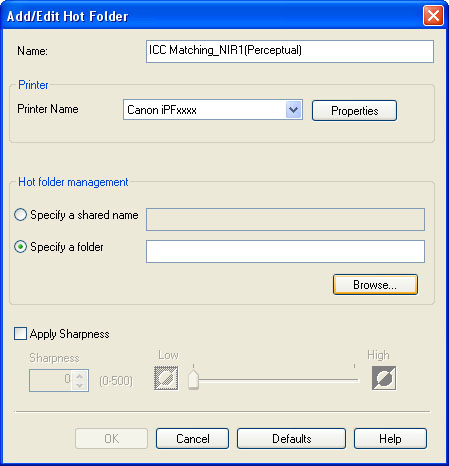
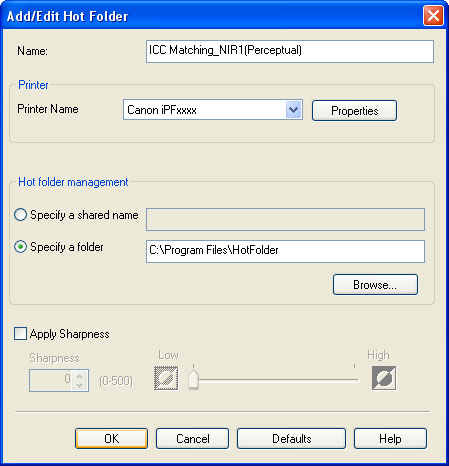
- The Add/Edit Hot Folder dialog box displays.
Enter the hot folder name in Name.Click the Browse botton, with selecting Specify a folder, to set the existing shared folder.
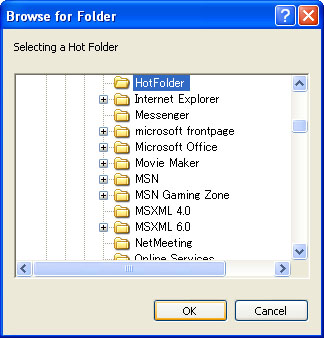
- The location of the folders will appear.
Select the folder to specify a hot folder, and click the OK button.
- As necessary, set the print conditions in the hot folder. (See "Setting the Print Parameters (3.4.8).")
Click the OK button to close the Add/Edit Hot Folder dialog box.
The hot folder you have created appears in the Hot Folder list in the Color imageRUNNER Enlargement Copy dialog box.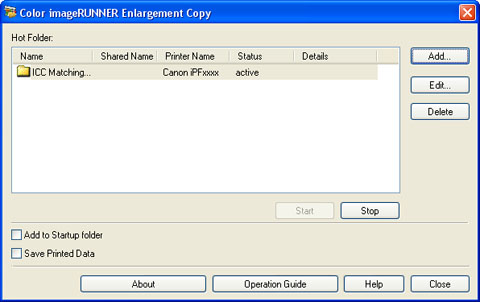
3. 4. 8. Windows Software > Color imageRUNNER Enlargement Copy >
Setting the Print Parameters
Setting the Print Parameters
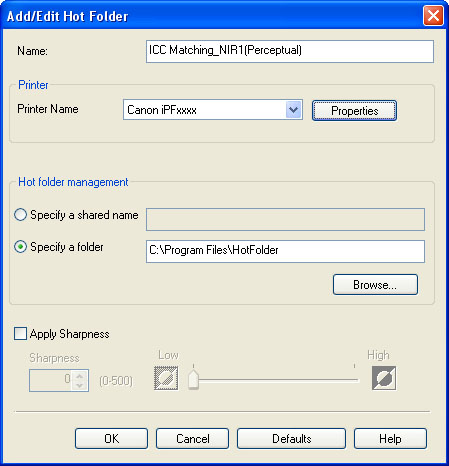
The printer driver opens when you click the Properties button in the Add/Edit Hot Folder dialog box. The printer driver is used to configure basic settings to match the type of media loaded in the printer.
 |
| Note | ||
|
• The only three sheets displayed are the Main sheet, the Page Setup sheet, and the Layout sheet. Some of the printer driver settings may be disabled.
|
||
•Apply Sharpness
Place a checkmark here to set the sharpness.
Drag the slider bar to the left or right to adjust. You can also adjust by directly entering a number in the numeric input field.
| Note | ||
|
• You can input between 0 and 500.
• You can change the numbers by clicking either
 button or button or  button. button.• You cannot be applied to PDF files.
|
||
3. 4. 9. Windows Software > Color imageRUNNER Enlargement Copy >
Printing Enlargements of Scanned Originals from a Color imageRUNNER
Printing Enlargements of Scanned Originals from a Color imageRUNNER
Originals you create by scanning with a Color imageRUNNER are transferred to a "hot folder" and printed automatically after enlargement according to printing conditions you specify for that folder.
This processing sequence is called the Color imageRUNNER Enlargement Copy function.
To use Color imageRUNNER Enlargement Copy, first complete these settings in the following order.
1.Register a hot folder on your computer.
Register a hot folder on your computer for storing scanned originals from the Color imageRUNNER and complete the settings for enlargement copy. For details, see "Creating a New Hot Folder (3.4.6)."
2.Complete the scanning settings on the Color imageRUNNER.
Configure the Color imageRUNNER to send scanned originals to the hot folder.
After these settings are complete, you can print enlarged copies of scanned originals from the Color imageRUNNER.